Ron Hodges Inc

Paver

How to Build a Paver Patio Without Digging
Paver

How to Build a Paver Patio Without Digging

Is it possible to construct a paver patio without digging? Yes, but only under certain circumstances. Just a compacted foundation placed on top of the dirt is sufficient for a modest, light-use patio on level, hard ground. Excavation is still necessary to ensure the long-term stability of a big entertainment area or one that can accommodate heavy furniture, a barbecue, or a fire pit. To help you choose the way that best suits your garden, this guide guides you through both. Why Homeowners Ask This Question Before almost every patio quotation at Ron Hodges Inc, we are asked a variation of the question, How to Build a Paver Patio Without Digging? It makes sense. Most people are afraid of the phase of the process that involves removing six to eight inches of dirt, transporting it away, and compacting a new foundation. It is labor-intensive, time-consuming, and may make a weekend job take two weeks to complete. Written from over 30 years of practical paver and concrete construction experience in Central Florida, this article explains how to construct a paver patio without digging. My name is Ron Bradley, and I have installed patios on almost every kind of soil in our state, from the clay pockets found further inland to the sandy backyards of Winter Springs. Because Florida ground reacts differently from the clay-heavy soil featured in most internet guidelines developed for other regions of the nation, that expertise is important. The idea of “skipping the dig” for your project is altered by the fact that sandy soil drains quickly but lacks the clay-like ability to retain form.  Can You Really Build a Paver Patio Without Digging? The short answer is yes. Modern methods let you build a patio on top of the existing ground instead of digging it out first. The most common approaches are: Sand bed method. A layer of coarse sand spread and leveled directly over compacted soil. Fast and cheap, but best for small, light-use areas. Crushed stone pad. A shallow layer of crushed stone or paver base material laid over the ground, tamped down, then topped with a thin sand layer. This is the most durable no-dig patio option for Florida yards. Raised paver patio system. Pedestal or grid systems that hold pavers slightly above the ground. Common for rooftop decks or areas where the ground is too uneven to work with directly. Rubber patio blocks. Interlocking rubber pads, mostly used for play areas or temporary setups rather than a finished outdoor living space. Here is how those four methods compare side by side. Method Base Material Best For Typical Lifespan Pros and Cons Sand bed Coarse sand Small paths, decorative areas 3 to 6 years Cheap and quick, but shifts in heavy rain Crushed stone pad ¾ inch crushed stone Small to mid-size patios 8 to 12 years Good drainage, holds up well in Florida rain Raised paver system Pedestal or grid Uneven ground, rooftops, decks 10 to 15 years Stable, but higher material cost Rubber blocks Recycled rubber Play areas, temporary use 3 to 5 years Flexible and easy to install, limited style options Knowing how to build a paver patio without digging the right way starts with picking the method that matches how you actually plan to use the space, not just the one that requires the least work up front. Read more How to Install a Brick Patio When No-Dig Actually Works Can you lay pavers without digging and expect a good result? In some cases, yes. A no-dig approach tends to work well for: Garden paths or stepping stone areas with light foot traffic Small decorative patios that will not hold heavy furniture Firm, well-drained soil that already sits fairly level Florida’s sandy soil is a mixed blessing here. It drains water quickly, which helps avoid pooling, but it also shifts more easily under weight than the dense clay soils found in the Midwest or Northeast. That means a no-dig patio built on Florida sand may need re-leveling sooner than the same setup built somewhere with heavier clay soil. If your project is small and low-traffic, that is a fair trade for the time saved. When You Should Still Dig, Even a Little A shallow two to three-inch base cut into the top layer of grass and topsoil, followed by a proper gravel and sand layer, gives you most of the time savings of a no-dig approach with much better long-term stability. This is especially important during Central Florida’s rainy season, when heavy storms can wash out a shallow base, cause pooling under the pavers, and lead to sand washing out from between the joints. A little extra prep now saves a full rebuild later.  Step-by-Step: Build a No-Dig Paver Patio Once you have decided a no-dig approach fits your project, here is the process we recommend, whether you are doing it yourself or want to understand what a contractor should be doing. Plan and mark the layout. Measure your space and mark the outline with stakes and string. Set a slight slope of 1/8 to 1/4 inch per foot, sloping away from your house, so water has somewhere to go. Clear the area. Remove grass, roots, rocks, and any debris from the surface. Lay landscape fabric under pavers. This separates the soil from your base material and helps cut down on weed growth over time. Add a crushed gravel base. Even for a no-dig patio, a two to three inch layer of crushed stone gives you far better stability than pavers laid directly on bare soil. Compact the base. Use a hand tamper or plate compactor to firm up the gravel layer until it feels solid underfoot. Screed a sand bed. Spread and level about one inch of paver sand over the compacted base using a straight board. Lay the pavers. A herringbone pattern locks pavers together well and holds up better under foot traffic than a simple grid layout. Cut border pavers as needed. Most patios need a
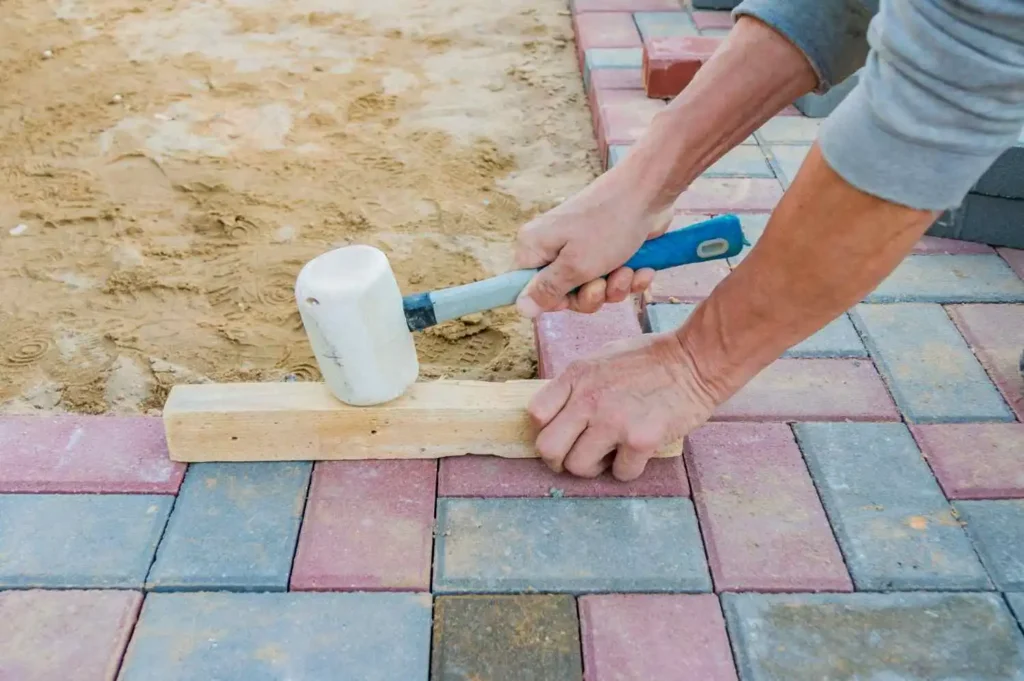
Worker leveling concrete blocks for how to seal pavers with sand project.
Paver

How to Seal Pavers with Sand: Complete Step-by-Step Guide

For how to seal pavers with sand, the usual process is to clean and prepare the pavers, fill the joints with polymeric sand, activate the sand with water, let it cure, and then apply a paver sealer. The full process typically takes a few days, depending on the weather, product, and curing time. Ron Hodges Inc follows this same careful approach for Sand & Seal projects, helping protect paver patios, driveways, and walkways from weeds, stains, shifting joints, and erosion. What “Sealing Pavers with Sand” Actually Means This phrase confuses a lot of homeowners, and that’s fair. It is not one single product or one single step. It is two different jobs working together. First, polymeric sand for pavers goes into the joints between each stone. This is not regular play sand. It has a binding agent mixed in that hardens once it gets wet, locking the joints in place. Second, a paver sealer application goes over the whole surface, including the hardened sand, to protect against stains, sun damage, and water. Some products combine both jobs into one, known as a sand-locking sealer, which stabilizes the joints and coats the surface at the same time. Knowing which path you are on before you buy anything will save you a wasted trip to the hardware store. Read more How to Install a Brick Patio Choose Your Approach Before You Start This is the step most guides skip, and it is the one that causes the most callbacks for contractors. You have two real options, and they should not be mixed. Option one: Use polymeric sand in the joints, let it cure fully, then apply a standard paver sealer over the top. This is the most common route and works well for most driveways and patios. Option two: Use regular, non-polymeric joint sand, then apply a sand-locking sealer that hardens the sand as part of the sealing process. Some manufacturers actually warn against using polymeric sand underneath a sand-locking sealer, because the two products can fight each other and cause a cloudy film once dry. Pick one path and stick with it. Read the label on your sealer before you buy your sand for sealing pavers. This single decision is really what how to seal pavers with sand comes down to, and it prevents most of the haze and bonding problems homeowners run into later. Tools and Materials You Will Need Polymeric sand for sealing pavers (enough for full joint depth, based on square footage) Stiff broom and a smaller hand broom Leaf blower Garden hose with a fine mist nozzle Pressure washer (optional, for heavy cleaning) Paver sealer of your choice Foam roller or pump sprayer Gloves, eye protection, and a dust mask Step 1: Clean the Pavers Thoroughly Dirt, algae, and old sand left on the surface will trap moisture under your new sand and sealer, which leads to staining later. Sweep off loose debris first, then wash the pavers with a mild cleaner and water, or a pressure washer set to a wide, low-pressure fan pattern. Pay close attention to any efflorescence on pavers, that white, chalky film caused by minerals rising to the surface. It needs to be cleaned off, and in some cases it needs time to fade on its own before you seal, or it will get locked in under the finish. Step 2: Let the Pavers Dry Completely This step gets rushed more than any other, and it is where a lot of DIY jobs go wrong. The surface might look dry within an hour in Florida heat, but the paver itself can still hold moisture underneath. If you apply polymeric sand or sealer while that hidden moisture is still there, it can trigger a hazy white film once everything cures. Give your pavers at least a full day of dry, sunny weather before moving forward, longer if it rained heavily in the days before. Step 3: Remove Old or Loose Joint Sand Sanding pavers that already have old, cracked joint sand takes a bit more prep work. If you are refreshing an older patio or driveway, pull out the old sand down to the base of the joint. Polymeric sand only works well when it fills the joint at full depth. A shallow top layer over old sand will not bond properly and tends to crack or wash out within a season. A pressure washer on a narrow tip or a simple joint tool works for this. Step 4: Sweep In the Polymeric Sand Pour the sand over the surface and sweep it into the joints with a stiff broom, working it in from multiple directions. Tap the pavers gently with the broom handle or use a plate compactor on larger jobs to help the sand settle fully. Keep sweeping in sand until it sits about one eighth of an inch below the top of the paver, which matches the standard set by the ICPI, now part of the CMHA, for proper paver joint stabilization. Once the joints are filled, sweep every bit of loose sand off the paver surface, then use a leaf blower held at a low angle to clear the last bit of dust. Any sand left sitting on top will turn into a stain once it gets wet. Step 5: Activate the Sand with Water This is where a sand-locking sealer or standalone polymeric sand actually hardens. Set your hose nozzle to a fine mist, not a heavy stream. Spray the joints in short bursts, pausing between each pass to let the water soak in before adding more. You want the sand fully damp all the way through, not flooded. If you see a milky, white haze forming on the paver surface while watering, you have added too much too fast and pushed the binding polymers out of the joint. Stop, let it dry, and address any residue before it sets. Step 6: Let the Sand Cure Cure times vary a lot between brands, and this is where a

how to install a brick patio​
Paver

How to Install a Brick Patio: A Complete Step-by-Step Guide

Brick patios can transform a simple backyard into an inviting outdoor room, adding living space, increasing curb appeal, and giving your yard a finished look that lasts decades with proper installation. I have over three decades of experience installing patios in Winter Springs, Oviedo and Longwood that stand the test of time; often what determines their longevity lies before the first brick goes in place. This guide walks you through how to install a brick patio the same way we approach it on real job sites here in Central Florida. Your goal will be to learn the essential steps of planning, prepping, laying patterning, and finishing joints – you will also receive honest guidance as to whether any project may benefit from hiring professional crew. Key Takeaways Careful brick patio base preparation matters more than the bricks you choose. Plan for a slope of about 1/4 inch per foot so water drains away from your home. Herringbone patterns interlock the strongest, but need more cuts than running bond. Polymeric sand locks joints in place and resists weeds better than plain sand. DIY installs can save money, but excavation and compaction are heavy, tiring work. A properly built patio can last decades with light seasonal upkeep. Planning Your Brick Patio Plan your brick patio with the right layout, materials, base preparation, and design to create a durable and attractive outdoor space that fits your home and lifestyle. Choosing a Layout and Pattern Start by picking a brick patio pattern. Running bond is the easiest for a first-time DIY because the bricks line up in simple rows. Herringbone and basket weave patterns look more custom, and herringbone in particular locks bricks together tightly under foot traffic, but both patterns take more cutting and patience. Sketch your shape on paper first and think about how the patio connects to your doors, walkways, and any existing landscaping. Measuring Your Space and Planning the Slope Measure the full area so you know how many bricks and how much base material to order. Every patio needs a gentle slope, about a quarter inch of drop for every foot, so rainwater moves away from your foundation instead of pooling against it. Skipping this step is one of the most common reasons patios flood or shift over time. Checking Local Rules Before you touch a shovel, call 811 to have underground utility lines marked on your property. It is a free call and it can save you from a costly mistake. Many cities in Orange and Seminole County also require a permit for larger hardscape projects, so check with your local building department, especially if your patio ties into drainage near the house. Tools and Materials Checklist Tools Materials Plate compactor Bricks or pavers (add 10% extra) Rubber mallet Crushed stone base String line and stakes Bedding sand Carpenter’s level Polymeric sand Masonry saw or brick chisel Edge restraints Shovel and rake Landscape fabric Wheelbarrow Weed barrier pins Broom Having the right gear staged ahead of time is one of the simplest parts of how to install a brick patio, but it saves you from stopping mid-project for a trip to the store. A plate compactor is worth renting even for a small patio. Hand tamping alone rarely compacts the base deep enough to prevent settling later. How Much Material Do You Need Before you order anything, do the math so you are not left short on your delivery day. This part of how to install a brick patio is where a lot of DIY guides fall short, so here is a simple way to work it out. For crushed stone patios, multiplying their square footage by 0.0125 will provide an approximate estimate of cubic yards needed for a 4-inch base layer. When multiplying square footage times 0.0031 for bedding sand layers (1 in thickness). Finally, to estimate brick patio coverage accurately divide patio area by the amount covered by one brick then add 10% for cuts and waste. Example: for a 200 square-foot patio, approximately 2.5 cubic yards of crushed stone and 0.6 cubic yards of bedding sand will be needed, plus sufficient bricks to cover an additional area of 220 square feet when taking waste into account. It is always less costly to order extra material rather than pay twice for delivery fees. Step-by-Step Brick Patio Installation These are the core DIY brick patio steps we follow on every job, scaled down for a homeowner working alone or with one helper. Step 1: Mark and Square the Layout Drive stakes at each corner and run string lines to outline the patio. Check that it is square by measuring both diagonals. If the two measurements match, your corners are true. This five minute check prevents crooked rows later on. Step 2: Excavate to the Proper Depth Dig out the area to about 7 to 8 inches deep for a patio, extending a few inches past your string lines for the edge restraints. Florida’s sandy soil digs easily but does not hold a shape well, so work in small sections and keep checking your slope as you go. Step 3: Lay and Compact the Crushed Stone Base This is the heart of brick patio base preparation. Spread the crushed stone in 2 inch layers and run the plate compactor over each layer before adding the next. Rushing this step is the number one reason patios sink or shift within a year or two. Step 4: Add and Screed the Bedding Sand Pour a 1 inch layer of sand over the compacted base. Use a straight board resting on guide rails to screed it level. Work carefully here, since the sand bed sets your final surface height and slope. Step 5: Lay the Brick Pavers in Pattern Start at a straight edge, ideally against a wall or existing hardscape. Set each brick directly into the sand without hammering it, keeping a small, even gap between pieces. Check your string line often to keep rows straight. Step 6: Cut

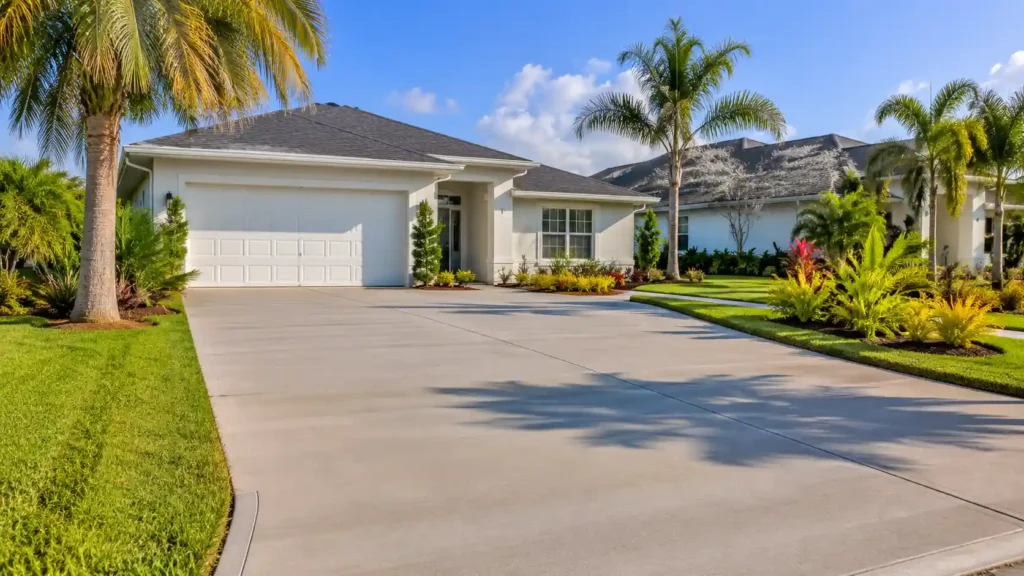
Newly paved concrete driveway leading to a modern white home, showing how much does it cost to pave a driveway.
Paver

How Much Does It Cost to Pave a Driveway?

So you’re asking how much does it cost to pave a driveway. In Central Florida, paving a driveway typically runs $8 to $22 per square foot. A standard two-car driveway costs between $3,200 and $8,800 total. Your final number depends on material, size, and site conditions. Concrete and pavers are the two most common choices in any area. Each one changes your budget in a different way. We’ll break down every cost factor below so you know what to expect. Average Driveway Paving Cost Breakdown Here’s the cost to pave a driveway per square foot by material, plus the average cost of a new driveway for a standard two-car layout. Material Cost per Square Foot Average Total (2-Car Driveway) Concrete $8 – $18 $3,500 – $7,800 Pavers $12 – $25 $5,200 – $10,800 Asphalt $7 – $15 $3,000 – $6,500 Many homeowners search for the asphalt vs concrete driveway cost difference before choosing a contractor. For an exact number on your property, our team can walk the site and act as a live concrete driveway cost calculator, giving you a firm quote instead of a rough estimate. What Affects the Cost to Pave a Driveway? Several things shape your final driveway paving cost. Here’s what matters most for homeowners in Winter Springs, Oviedo, and Longwood. Driveway Size and Square Footage Bigger driveways cost more overall, but often cost less per square foot. That’s because driveway paving cost by size doesn’t scale evenly. Mobilization fees and site preparation & grading stay fairly fixed no matter how big the job is. Knowing your square footage before you call for quotes speeds up the whole process. Material Choice: Concrete vs. Pavers vs. Asphalt Concrete gives you a clean, durable surface at a mid-range price. Pavers cost more upfront but let you swap out a single damaged stone instead of tearing out the whole slab. Asphalt is the cheapest option nationally, but it holds up poorly in Florida heat and isn’t something we recommend long term. Site Preparation and Grading Central Florida sits on a mix of sandy and clay soil. Sandy soil drains fast, but it still needs a compacted gravel base / sub-base to stay stable under vehicle weight. Skipping proper site preparation and grading cost is the top reason driveways crack or sink within a few years. This step alone can shift your total by $1 to $3 per square foot. Driveway Shape and Layout A straight, rectangular driveway costs less than a curved or circular one. Custom shapes need hand-forming and extra labor time. That adds 10% to 30% to your total bill. Labor Costs in Central Florida Labor cost per square foot in our service area runs $5 to $8. The exact number depends on crew size, equipment needed, and how fast the job needs to move around Florida’s rainy season. Permits in Orange and Seminole County Most driveway projects need a permit before work starts. Driveway permit cost Florida homeowners pay in Orange and Seminole County typically runs $50 to $250. A good contractor handles this paperwork for you. Understanding local permits & local codes before your budget avoids surprise delays mid-project. Concrete Driveway Cost A plain, broom-finish concrete driveway costs less than a stamped or decorative one. Stamped concrete that mimics brick or stone can add $3 to $8 per square foot. Thickness matters too. Concrete driveway thickness and cost go hand in hand, since a standard 4-inch slab costs less than the 5- or 6-inch slab needed for trucks or RVs. Higher PSI concrete mixes cost more upfront but resist cracking better through Florida’s heat and rain cycles. If you’re planning a bigger outdoor upgrade, we also install Concrete Patios and Concrete Walkways alongside driveway work, which can save on mobilization costs. Paver Driveway Cost Paver driveway cost per square foot runs higher than concrete, usually between $12 and $25 depending on the material. Concrete pavers are the most affordable option. Brick pavers cost more but bring a classic look. Natural stone sits at the top of the price range. The upside is repair cost. If one paver cracks or stains, you replace that single piece instead of the whole driveway. That makes Paver Installation a smart long-term choice for homeowners who want lower repair bills down the road. Concrete vs. Pavers: Which Is Better for Florida Driveways? Factor Concrete Pavers Heat resistance Handles Florida summers well Handles heat well, some color fading Rain and drainage Can pool without proper slope Naturally permeable, drains faster Cracking risk Can crack with shifting soil Individual stones flex, less cracking Lifespan 25 to 40 years 25 to 50 years Maintenance Reseal every 2 to 3 years Re-sand and reseal every 3 to 5 years This paver vs concrete driveway comparison matters more in Florida than in most states, because our rainy season and sandy soil put extra stress on any surface. A proper drainage system underneath either material makes the biggest difference in how long your driveway actually lasts. Additional Costs to Budget For Old Driveway Removal If your project involves a cost to replace a driveway situation, tearing out the old surface adds $1 to $3 per square foot before new material goes down. Drainage Solutions Florida’s rainy season means your drainage system needs to move water away from your home’s foundation, not toward it. Skipping this step now usually means costly repairs later. Sealing and Sand & Seal Maintenance Sealing & resealing protects your investment over time. Driveway sealing cost runs $0.50 to $2 per square foot depending on material. Our dedicated Sand & Seal service fills paver joints and locks in color, extending the life of your driveway by several years. If your surface just needs a refresh instead of a full tear-out, this beats a full driveway resurfacing cost every time. Permit Fees As mentioned above, budget $50 to $250 for permits in Orange and Seminole County, plus any inspection fees your specific municipality requires. How to Save Money on Driveway Paving Get at

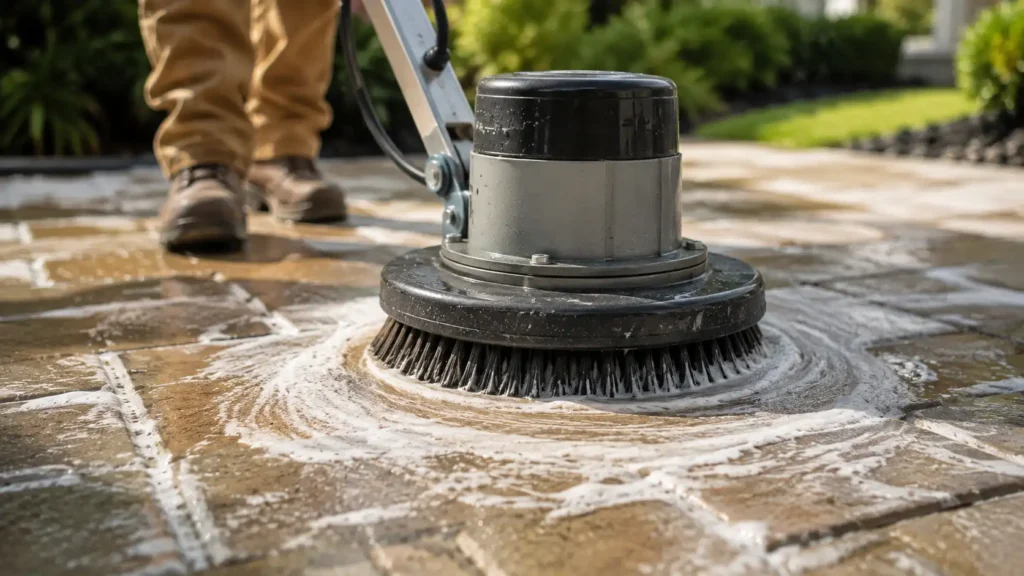
Person using a motorized scrub brush to learn how to clean pavers without pressure washer.
Paver

How to Clean Pavers Without a Pressure Washer

Grabbing a pressure washer feels like the obvious move when your patio looks dingy. It’s fast and satisfying to watch, but here’s the problem: that high-pressure blast can etch the surface, fade the color, and strip sand right out from between the joints. Once the joint sand disappears, weeds and ants show up within a week or two. So if you’ve been searching for how to clean pavers without pressure washer damage, you’re already asking the right question. This guide covers a method that actually works, using stuff you probably already have around the house. We’ll get into stain removal, how different paver materials behave, and a few things worth knowing if you live in Central Florida. And if the project grows bigger than a Saturday afternoon, Ron Hodges Inc handles professional paver cleaning throughout Winter Springs, FL. Why Skip the Pressure Washer? Before you drag the equipment out of the garage, it’s worth understanding what that machine is actually doing to your pavers. High PSI wears down the surface of concrete pavers over time, leaving it dull and washed out. Those strong water jets blast joint sand loose, which opens the door to weeds and ants. Trapped moisture from an overly aggressive wash job increases the odds of chalky, white efflorescence forming on top. Overspray and runoff aren’t kind to nearby grass, flower beds, or pool decks. Honestly, pressure washer damage to pavers is one of the most common complaints we hear from homeowners who power wash every spring without thinking twice. A gentler approach protects both the paver material and the sand holding it all together. Know Your Paver Type First Not all pavers respond the same way to soap, water, or a brush. Matching your method to the material is part of doing this right, and it’s a piece of concrete paver cleaning tips many guides skip entirely. Paver Type Recommended Method Avoid Concrete Pavers Mild detergent, warm water, stiff brush Wire brushes, harsh acids Natural Stone (limestone, travertine) Gentle, pH-neutral paver cleaner Bleach, strong acids Porcelain Dish soap and warm water Abrasive scrubbers Natural stone paver care calls for a lighter touch than concrete. Stone is more porous, so it soaks up chemicals faster and scratches more easily. What You’ll Need Good news here: you don’t need anything fancy. Most of this is already sitting in a garage or under a kitchen sink somewhere. A stiff bristle brush or push broom Garden hose with a fan spray nozzle Two buckets Mild dish soap or a pH-neutral paver cleaner White vinegar and baking soda for spot stains Rubber gloves and eye protection Polymeric sand for joint touch-ups Step-by-Step: How to Clean Pavers Without Pressure Washer Work through these in order. Jumping ahead usually means going back and redoing a step you skipped. Step 1: Clear the Area and Dry Sweep Move furniture, planters, and grills out of the way first. Then sweep away loose dirt, leaves, and grit with a stiff broom before you introduce any water at all. Step 2: Pre-Wet the Surface Give the pavers a light mist with the hose. This protects the color and keeps whatever cleaning solution you use from soaking in too fast and streaking. Step 3: Mix and Apply a DIY Paver Cleaning Solution A basic dish soap and warm water method takes care of most everyday grime. Mix a few drops of dish soap into a bucket of warm water and you’ve got a simple paver cleaning services ready to go. For tougher buildup, try a white vinegar cleaning solution made from equal parts vinegar and water. Spread it across the surface and give it five to ten minutes to sit before you move on. Step 4: Scrub With a Stiff Brush Scrub in small circles to lift dirt without grinding down the surface underneath. Whatever you do, don’t reach for metal bristles. Wire brush damage leaves scratches that no sealer on earth will fix later. Step 5: Rinse With a Garden Hose A soft fan spray beats a direct jet every time here. Rinse from the top of the slope down, and try not to aim water straight into the joints since that’s exactly what displaces the sand. Step 6: Re-Sand the Joints Once everything dries, take a look at the paver joint sand and see where it’s gotten thin or gapped out. Sweep in fresh polymeric sand and follow whatever misting instructions came with the bag for proper joint sand replacement. Skip this and the whole patio starts feeling loose within a season. Step 7: Optional Sealing You don’t have to seal your pavers, but a good paver sealer genuinely helps. Sealing pavers protects against future stains, sun fading, and moisture problems down the line. Apply it in a thin, even coat once the surface is bone dry. How to Remove Specific Stains From Pavers Figuring out how to remove stains from pavers without a pressure washer really just comes down to matching the treatment to whatever’s causing the mark. Here’s what actually works for the usual suspects. Rust Stains Rust stains on pavers typically trace back to metal furniture, tools left out in the rain, or fertilizer overspray. A masonry-safe rust remover is your best bet. Bleach won’t touch rust, and it might discolor the surrounding concrete instead. Oil and Grease Stains Oil and grease stain removal starts with something absorbent. Sprinkle baking soda or even cat litter over a fresh spill, let it sit for about half an hour, then scrub with dish soap and rinse it away. Moss, Algae, and Mildew Moss and algae on pavers love shaded, damp corners of the yard. An oxygenated cleaner breaks all that organic buildup down without bleaching out the paver color. Scrub it, rinse it, and let the sun handle the rest of the drying. Tannin and Leaf Stains Leaf stains leave those brownish outlines that soak into porous concrete surfaces. The same oxygenated cleaner used for algae handles this too, paired with a bit of light

Scroll to Top