Ron Hodges Inc

Concrete

What Is the Cheapest Type of Walkway
Concrete

What Is the Cheapest Type of Walkway?

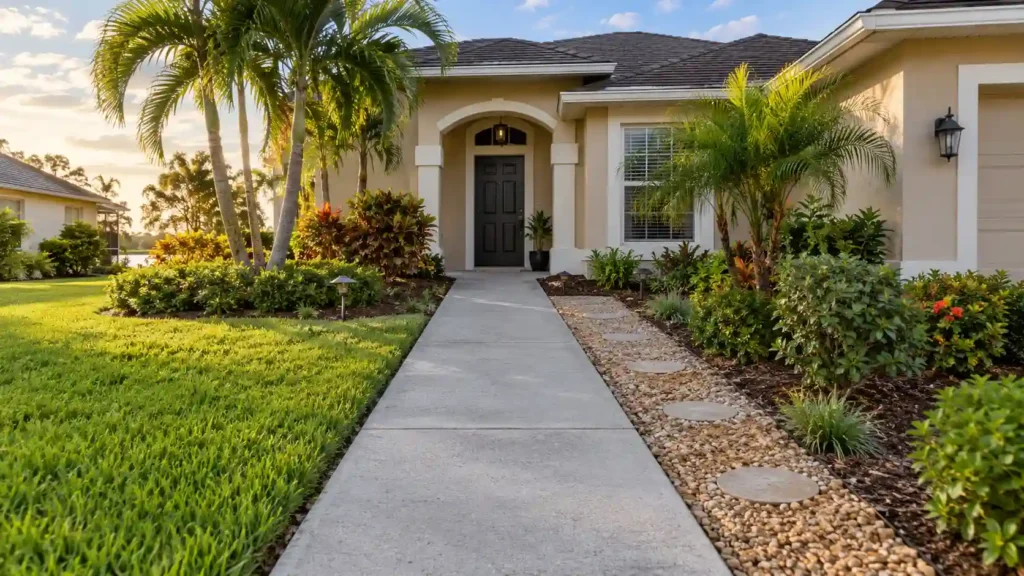
What is the cheapest type of walkway? Loose gravel costs the least to buy, at about $1.80 to $3.50 per square foot for pea gravel. Basic poured concrete is usually the cheapest walkway that stays put and needs little care. Pavers cost more up front, but you can fix one stone at a time. Your final price depends on four things: the surface, site prep, labor, and upkeep. A low-cost surface on poor soil can cost more than concrete over time. Below you will find real price ranges, ways to save, and the best low-cost pick for Central Florida homes. What Is the Cheapest Walkway Material? Gravel is the cheapest walkway material to buy upfront, while poured concrete is the cheapest permanent option that lasts. Gravel Gravel is the most affordable walkway material on the market, with pea gravel costing just $20 to $80 per cubic yard and covering roughly 108 square feet at a 3-inch depth. While its casual look, excellent drainage, and low initial price make it highly appealing, it comes with long-term downsides. Loose stones easily shift into the lawn, requiring protective edging and weed fabric, and the unstable surface presents accessibility challenges for strollers, wheelchairs, and high heels. Basic Concrete A basic concrete walkway is a permanent, plain gray slab poured 4 inches thick that provides a durable, low-maintenance path with a non-slick broom finish. It typically costs $6 to $12 per square foot (or $7 to $17 installed, according to HomeGuide), making it a highly cost-effective choice for straight, flat paths. While it requires very little care and uses control joints to cleanly manage natural cracking, its main downside is repairability, as a damaged concrete section is much harder to fix or replace than a single, individual paver. Concrete Pavers Concrete pavers are pre-cast blocks locked together over a compacted base. They cost about $9 to $20 per square foot installed. Labor drives that price. Crews dig, pack the base, level the sand, set each stone, and sweep in joint sand. You get many colors, shapes, and patterns. If one paver stains or cracks, you swap it and leave the rest alone. The base matters most. A weak base means a sinking walkway within a few seasons. More on that in the section on installing pavers on dirt below. Stepping Stones Stepping stones fit garden and backyard paths. They cover less ground, so you buy fewer stones. Space them to match a normal step, about 24 inches from center to center. Set each stone level on a tamped bed of sand or fine gravel. A wobbly stone is a trip risk. Fill the gaps with gravel, mulch, or grass. This mix keeps cost low. It is not the best pick for a main entry with heavy daily traffic. Is Gravel Cheaper Than a Concrete Walkway? In most cases, yes. Gravel costs less to buy and to install. The gap is smaller than most people expect, though. HomeGuide lists gravel at $4 to $10 per square foot installed and concrete at $7 to $17. Those ranges overlap. Material price and installed price are not the same thing. Gravel stone is cheap, but labor, edging, fabric, and base still add up. Concrete costs more at first, but it needs far less care afterward. Factor Gravel Basic Concrete Initial material cost Lower Moderate Installation Simpler More involved Stability Can shift More stable Maintenance More frequent Lower Appearance Casual Clean and finished Long-term use Depends on traffic Good for regular foot traffic Gravel wins on day one. Concrete often wins over the years if you walk the path daily. For a garden path you rarely use, gravel is a smart pick. What Is the Cheapest Way to Build a Walkway? Keep the design simple and the prep solid. That cuts cost without cutting corners. Keep the walkway straight. Straight runs need fewer forms, fewer cuts, and less time. Use a practical width. Three feet fits one person. Four feet fits two side by side. Going from 4 feet to 3 feet on a 30 foot path saves 30 square feet. At $6 to $12 per square foot, that is $180 to $360. Avoid extra curves. Curves add cuts, forms, and labor hours. Choose a simple finish. A broom finish costs less than stamped concrete, which runs $10 to $21 per square foot. Use local materials. Stone and sand from a nearby yard cut delivery fees. Ask about leftover or reclaimed pavers too. Plan drainage first. A slope of at least 2 percent is the standard advice. That is about 1/4 inch per foot. Do not skip the base. A little stone now saves you from tearing the walk out later. 5 Cheap Walkway Ideas for a Home These are the five cheap walkway ideas for the home in Winter Spring, Fl. Gravel Walkway This is the best fit for garden paths. Lay weed fabric, add a packed crushed stone base, then top with pea gravel. Plastic or metal edging keeps the stone in place and costs less than stone borders. Concrete Walkway This is the best pick for front entries. A straight, plain slab with a broom finish is the lowest cost way to get a permanent path. Stepping-stone Walkway Mix flat stones or slabs with gravel or grass between them. You buy less new material, and the path looks natural. Simple Concrete Paver Walkway Pick plain gray pavers in a running bond pattern. Skip borders, inlays, and curves. Fewer cuts mean lower labor cost. Reclaimed Brick or Paver Walkway Used brick and pavers often cost little or nothing. Check yard sales, remodel leftovers, and Habitat for Humanity ReStores. Sizes vary, so setting them takes more time. Sort by thickness and use the same base steps as new pavers. Can You Lay Pavers on Dirt to Save Money? Installing pavers directly on Florida’s sandy soil risks structural failure because heavy rains easily shift loose sand, causing walkways to buckle or sink. Constructing a proper 4-inch compacted stone base
Is Concrete the Same as Cement
Concrete

Is Concrete the Same as Cement? No, Here’s the Real Difference

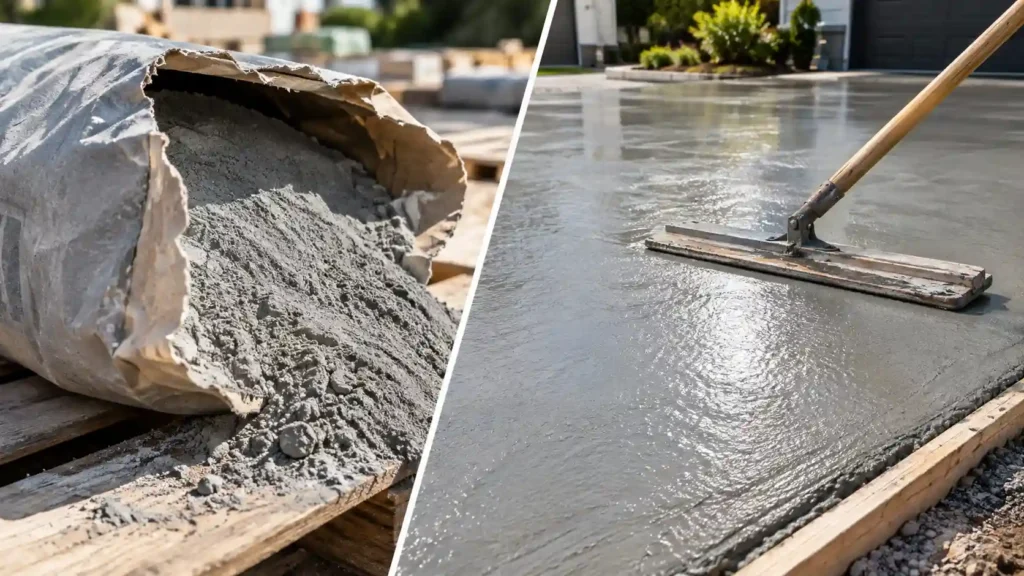
Is concrete the same as cement? No, it isn’t. Cement is a powder ingredient. Concrete is the finished building material cement helps create, along with water, sand, and crushed stone. Once you understand that one relationship, most of the confusion clears up fast. People use these two words like they mean the same thing every day. If you’re planning a driveway or patio pour, though, knowing the real difference matters for your project and your budget. What Is Cement? Cement is a fine gray powder made to bind other materials together. Manufacturers make it by heating limestone and clay in a giant kiln, at temperatures near 2,700°F. That process, called calcination, breaks the raw rock down and forms a rock-like substance called clinker. Workers then grind the clinker into the fine powder you know as cement. The most common type used in the U.S. is Portland cement. On its own, cement isn’t very strong. Mixed with water, it forms a thick paste. That paste is what glues everything else together once it hardens. Cement never gets poured by itself on a job site. It’s always the first step, never the final product. What Is Concrete? Concrete is the hard, gray building material you see in driveways, sidewalks, and foundations. It’s made by combining cement with water, sand, gravel, and crushed stone. Those sand and stone materials are called aggregate, and they make up most of the mix, usually 60 to 75 percent by volume. Cement in concrete only accounts for about 10 to 15 percent. Add water to cement and a chemical reaction called hydration begins. It forms a compound called calcium silicate hydrate, which is what actually hardens and locks the aggregate into one solid mass. That’s why concrete keeps getting stronger for weeks, not just hours. It’s still curing long after the surface looks dry. Cement vs. Concrete at a Glance Here’s a quick side-by-side, since a table answers this faster than a paragraph can. Factor Cement Concrete What it is A fine powder binder A finished building material Made from Limestone, clay, heat Cement, water, sand, gravel Compressive strength Weak on its own 2,500 to 4,500+ psi, depending on the mix Cure time Sets in hours as a paste Sets in 24 to 48 hours, fully cures around 28 days Typical cost $10 to $20 per 60 to 94-lb bag $110 to $165 per cubic yard delivered, national average Common uses Mortar, grout, small patches Driveways, patios, walkways, foundations, sidewalks Your actual price depends on your region, mix strength, and delivery distance. Why Everyone Mixes Up “Cement” and “Concrete” People say “pour the cement” so often it starts to sound correct. It isn’t. You can’t pour cement by itself. It’s a dry powder until you add water, and even then it needs sand and aggregate before it’s something you’d build with. The mix-up probably started because cement is the ingredient people recognize by name. Bags at the hardware store are labeled “cement” or “concrete mix,” and the packaging doesn’t always spell out the difference. Even the term “cement mixer” adds to it, since that machine actually mixes concrete, not plain cement. Throw mortar into the mix, made from cement, sand, and lime with no coarse aggregate, and it’s easy to see why people ask if concrete is the same as cement in the first place. Mortar bonds bricks and stone. It was never built to carry the weight a driveway slab has to handle. What Concrete Is Made Of If you’re wondering what concrete is made of, the short answer is four ingredients: cement, water, sand, and coarse aggregate like gravel or crushed stone. A standard mix ratio runs roughly 1 part cement to 2 parts sand to 3 parts aggregate, sometimes called the 4-2-1 rule once water is factored in. The water-cement ratio matters more than most people expect. Too much water weakens the finished slab. Too little makes it hard to pour and finish evenly. Most residential mixes aim for a ratio around 0.45 to 0.5. Contractors also use admixtures to change how a mix behaves on site. Some speed up curing in cold weather. Others slow it down in Florida heat, giving crews enough time to level and finish the surface before it starts to set. Ready-mix concrete, delivered by truck already blended, is what most driveway and patio jobs use. Bagged concrete mix, the kind sold at hardware stores, works fine for small pours like fence posts or steps, but it isn’t practical for a full driveway. Concrete Driveway Materials: What Actually Goes Into a Slab A driveway needs more than a basic mix. It has to hold up under the weight of vehicles for decades, not just months. Most residential driveways use concrete rated between 3,000 and 4,000 psi, based on ready-mix industry guidelines from the Indiana Ready Mixed Concrete Association. Go lower than that and you’re risking cracks sooner under regular car and truck traffic. Standard slab thickness for a passenger driveway runs about 4 inches, poured over a properly compacted base. Reinforcement matters too. Rebar or wire mesh embedded in the slab helps control cracking as the concrete shrinks slightly while it cures. Control joints, cut into the surface at set intervals, give cracks a planned place to happen instead of splitting randomly across your new driveway. Here’s a real number to work with. A 20 by 24-foot driveway poured at 4 inches thick needs close to 6 cubic yards of concrete. At a national average of about $125 per cubic yard, material alone runs around $750, before labor, forms, rebar, and finishing are added in. Want the full breakdown by vehicle type and climate? Our guide on How Thick Should a Concrete Driveway Be covers exact recommendations. Cement or Concrete: Which One Do You Actually Need? For most home projects, the answer is concrete, not cement alone. If you’re patching a small crack, filling a fence post hole, or fixing a chipped step, a bagged cement-based patch product

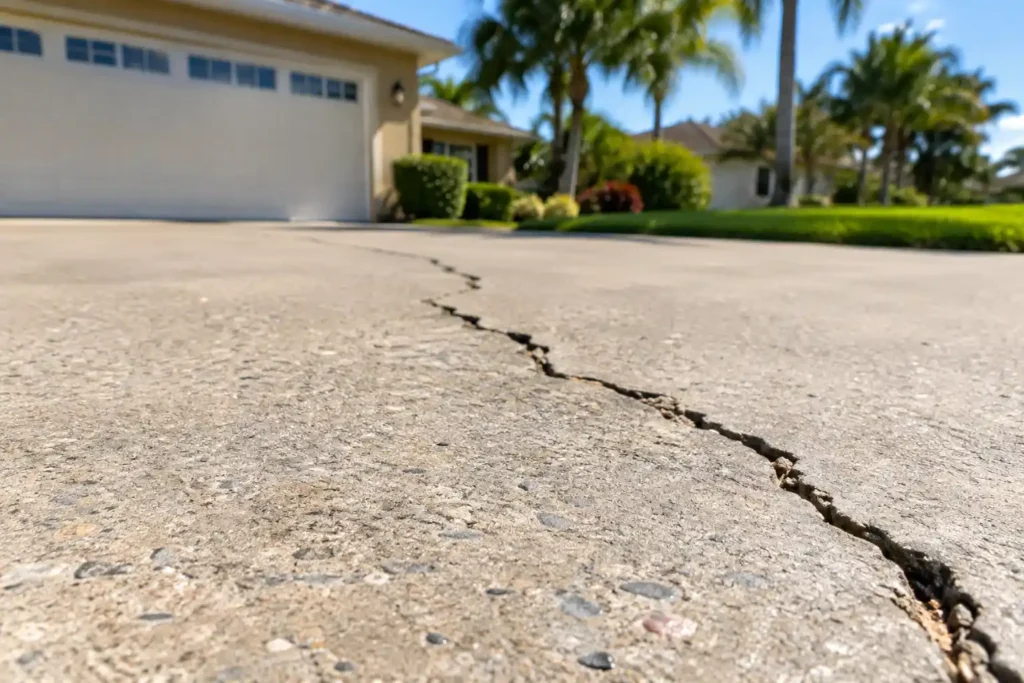
Close-up view of how to fix cracks in concrete driveway leading to a garage.
Concrete

How to Fix Cracks in Concrete Driveway

Cracks in a concrete driveway are almost never a surprise. They show up slow, one hairline at a time, until one day you notice a real gap running toward the garage. The good new is most cracks are fixable in an afternoon with the right fillers and a little patience. This guide walks through how to fix cracks in concrete driveway, from tiny surfaces lines to the wide ones that mean something deeper is going on underneath. The Quick Answer To fix a concrete driveway crack, you must first clean out all debris and dry the area completely before selecting a material based on the damage size. Minor hairline cracks under a quarter-inch wide are easy weekend DIY projects that only require a flexible polyurethane caulk. For wider or deeper gap, you will need to insert a backer rod finished with a non-sag sealant or use an epoxy injection. However, structural issue require professional intervention rather than a quick DIY fixes. If the crack is over half an inch wide, has one side higher than the other, or keeps coming back after previous repairs, you have an underlying base problems. In these cases, you should bypass retail sealants and call a contractor to address the foundation. Why Concrete Driveways Crack in the First Place Concrete cracks because it shrinks as it cures during its first year, leaving thin surface lines, and continues to expand and contract with temperature swings for the rest of its life. More severe settlement cracks occur later when the ground underneath compacts unevenly or washes away entirely. Contractors typically blame this shifting on a poorly compacted base, though tree root intrusion and heavy hydrostatic pressure from rainwater pushing up from below are also major culprit. In Central Florida town like Winter Springs, Oviedo, and Longwood, local conditions accelerate this damage. Summer heat drives slab temperatures past 100 degree, causing severe expansion, while the region notorious sandy subgrade shifts easily and fails to compact like clay. When heavy rains rapidly saturate this unstable soil, the ground moves beneath the expanding concrete, making driveway cracking repair a uniquely frequent headache for local homeowners. First, Figure Out What Kind of Crack You’re Dealing With Before you buy anything, take five minutes and actually look at the crack. This step gets skipped constantly, and it’s the difference between a repair that lasts and one you’ll be redoing next year. Run through this checklist: Is one side of the crack higher than the other? That’s a trip hazard and a sign of settlement. Is it wider than a pencil (roughly a quarter inch)? Does it run all the way to the edge of the slab? Are there several parallel cracks nearby, not just one? Does water pool along it after rain? If you answered yes to any of those beyond the first question, you’re not looking at a cosmetic fix. Hairline or Cosmetic Cracks These are thin, often called crazing, and usually under an eighth of an inch. They’re shrinkage cracks and they don’t threaten the driveway’s strength. They’re mostly about keeping water out so they don’t grow. Moderate Cracks (Under 1/2 Inch) These have some depth to them and often run a few feet. They still respond well to sealant, but they need proper prep, not just a squeeze of caulk on top. Structural or Wide Cracks Anything over half an inch, anything with a height difference between the two sides, or anything paired with sinking nearby is structural. These need more than filler. We’ll get into what that means later in this guide. How to Fix Small or Hairline Cracks This is the most common version of driveway crack repair, and it’s genuinely a DIY-friendly job. Clean it out. Use a wire brush or pressure washer to clear dirt, loose debris, and old sealant from the crack. Let it dry fully. Concrete needs to be bone dry for sealant to bond. Give it a few hours in the sun, longer if it rained recently. Fill the crack. Load a flexible polyurethane caulk or self-leveling caulk into a caulk gun and run a steady bead along the length of the crack. Smooth it out. Use a putty knife or the tip of the caulk tube to level the sealant flush with the surrounding concrete. Let it cure. Most products need 24 hours before you drive or walk on the area. Check the label, since cure times vary by brand and temperature. Skip the backer rod on hairline cracks. It’s not needed until the crack has real depth to it. How to Fix Large Cracks in a Concrete Driveway Wide or deep cracks need a different approach, and this is where a lot of DIY driveway repair goes sideways. Homeowners grab a bag of rigid patching compound, pack it in, and watch it crack right back out within a season. We’ll cover why that happens in the next section. Installing Backer Rod For cracks wider than a quarter inch, push a foam backer rod into the gap before you add any sealant. The rod does two things: it keeps the sealant from sinking too deep into the crack, and it creates the right shape for the caulk to flex without tearing. Push it in with a putty knife until it sits about a quarter inch below the surface. Applying and Smoothing the Caulk or Epoxy Epoxy injection restores structural strength to load-bearing concrete by fusing fractured slabs into a rigid piece, demanding a dry environment and costing between $300 and $800 professionally. In contrast, polyurethane caulk provides a flexible seal suited for shifting joints in damp conditions, with professional applications ranging from $150 to $500 and DIY tubes costing $10 to $25. For more details on concrete repair options, visit Concrete Network. Products That Actually Hold Up (and Ones to Skip) Product that actually holdup the concrete from crack. Polyurethane Caulk This is the workhorse for most driveway cracks. It stays flexible after curing, which matters because concrete never stops

How Much Does a 20x20 Paver Patio Cost
Concrete, Paver

How Much Does a 20×20 Paver Patio Cost? (2026 Price Breakdown for Florida)

So, how much does a 20×20 paver patio cost? Expect to pay between $6,000 and $16,000 installed, or about $15 to $40 per square foot. Basic concrete pavers land near the low end. Natural stone and detailed patterns push you toward the top. This guide breaks down the real numbers, not just averages. You’ll see what drives your price up or down in Winter Springs, Oviedo, and Longwood. Ron Hodges Inc built this pricing from actual jobs across Central Florida, not national guesses. 20×20 Paver Patio Cost at a Glance A 20×20 patio covers 400 square feet. Your total cost depends mostly on which material you pick and how much site work your yard needs. Tier Materials Cost Per Sq Ft Total Installed Cost Budget Standard concrete pavers, simple layout $15–$20 $6,000–$8,000 Mid-range Upgraded concrete pavers, borders, minor features $20–$28 $8,000–$11,200 Premium Natural stone or custom design work $28–$40+ $11,200–$16,000+ Most homeowners in our service area land in the mid-range tier, somewhere between $8,000 and $11,000 for a 20×20 patio with a solid base and a clean pattern. Cost Per Square Foot: Here’s the Math A 20×20 space equals 400 square feet. Once you know your cost per square foot, the math is simple. Budget concrete pavers: 400 × $15 = $6,000. At the top of that tier, 400 × $20 = $8,000. Mid-range concrete pavers with upgrades: 400 × $28 = $11,200. Premium natural stone: 400 × $40 = $16,000. This is why two homeowners can ask the same question and get two different quotes. The square footage stays fixed. The material and labor rate don’t. What’s Actually Included in That Price A patio quote is not just the cost of pavers sitting in your yard. It covers several line items, and each one adds up. Here’s a rough breakdown for a $9,000 mid-range job: Materials (pavers): around $3,150 (35%) Excavation and gravel base: around $2,250 (25%) Labor cost: around $2,700 (30%) Edge restraint and polymeric sand: around $900 (10%) The gravel base matters more than most homeowners realize. A compacted base keeps your pavers from shifting, sinking, or heaving after a few Florida rainy seasons. Skipping this step is the top reason patios fail early. Edge restraint locks the outer pavers in place, and polymeric sand fills the joints so weeds and ants have a harder time getting in. Paver Material Options Compared Material choice changes both your price and how the patio looks in ten years. Material Cost Per Sq Ft (Installed) Durability Look Concrete pavers $15–$22 25 to 30+ years Wide range of colors and patterns Brick pavers $18–$25 25+ years Classic red and earth tones Flagstone $20–$30 30+ years Natural, irregular shapes Travertine $22–$35 25 to 30 years, needs periodic sealing Elegant, stays cool underfoot Porcelain pavers $25–$38 25+ years, very low maintenance Modern, stain resistant Concrete pavers remain the most popular choice for a 20×20 backyard patio. They hold up well in Florida heat, come in dozens of styles, and cost far less than natural stone without giving up much durability. What Affects Your Price in Winter Springs, Oviedo & Longwood If you’re asking how much does a 20×20 paver patio cost in Central Florida specifically, a few local factors matter more than they would elsewhere. Sandy soil. Much of Seminole and Orange County sits on sandy soil, which drains fast but compacts differently than clay. A proper base depth prevents settling, and skipping it shows up as low spots within a year or two. Drainage. Florida’s summer storms drop heavy rain in short bursts. A patio without the right slope or drainage plan can send water toward your foundation instead of away from it. Orange County requires a lot grading and drainage plan for hardscape projects over 150 square feet, which covers a full 20×20 patio. HOA approval. Many communities in Winter Springs and Oviedo have design guidelines covering paver color, pattern, and placement. Check your HOA rules before you finalize a design, since changes after approval can add time and cost. County permits. Seminole County and Orange County both handle permitting through their own online portals, and rules vary by project size and whether the patio connects to your home. It’s worth confirming requirements before work starts rather than after. If you want a patio installer in Winter Springs FL who already knows these local rules, Ron Hodges Inc handles the permit questions, the base work, and the design in one conversation. How Long Does It Take to Install? A 20×20 paver patio usually takes 3 to 5 working days once the crew starts, weather permitting. Day 1: Layout, excavation, and hauling off old sod or soil. Day 2: Base installation and compaction. This step needs dry conditions to compact properly. Day 3: Paver laying begins, following the chosen pattern. Day 4: Cutting edge pieces, setting edge restraint, and finishing details. Day 5: Polymeric sand sweep-in and final cleanup. Florida’s rainy season, roughly June through September, can stretch this timeline. Base compaction needs dry soil, so a week of afternoon storms can push a 4-day job into 6 or 7 days. Is 20×20 Big Enough? What It Actually Fits A 400-square-foot patio is one of the most requested sizes because it hits a sweet spot. It’s big enough to feel like a real outdoor room without swallowing the whole backyard. Here’s what typically fits in that space: A dining set for six to eight people, with room to walk around chairs A separate lounge zone with a sofa and coffee table A small fire pit or built-in seat wall along one edge Walking space between zones so the patio doesn’t feel cramped If you’re planning a fire pit and a dining area both, 20×20 gives you enough room to keep them from feeling squeezed together, as long as the layout gets planned before installation starts. DIY vs. Professional Installation DIY installation can lower your material cost to roughly $5 to $8 per square foot, or about $2,000 to $3,200 in materials

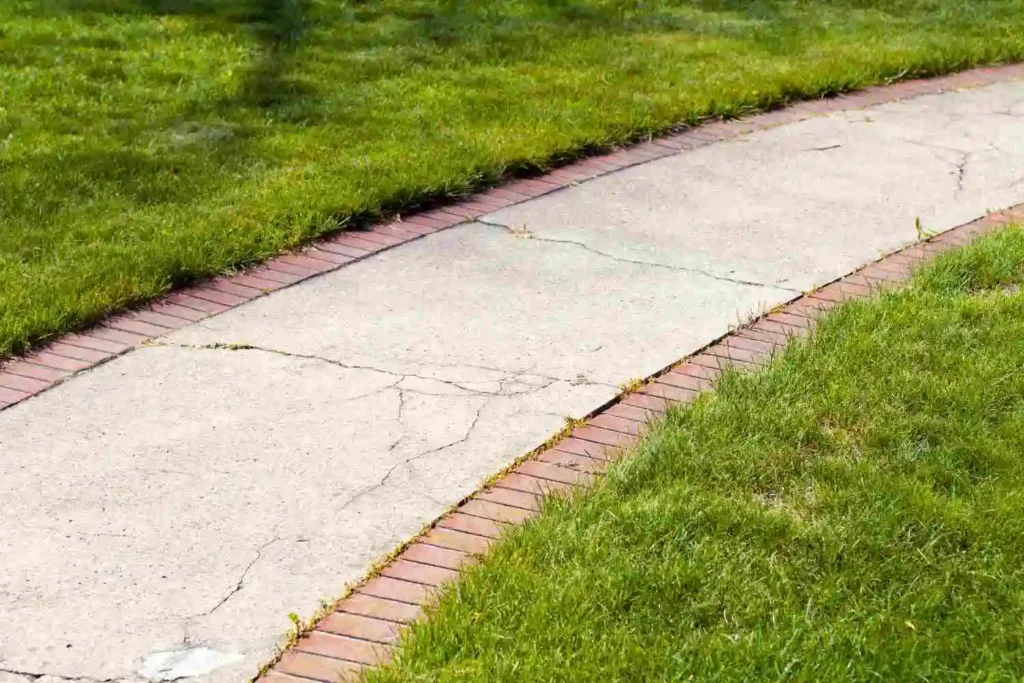
Concrete walkway framed with red brick borders, demonstrating what are sidewalks made of in residential areas.
Concrete

What Are Sidewalks Made Of? (Concrete Mix, Materials & Types Explained)

Streets and sidewalks are almost exclusively constructed of concrete, as evidenced by nearly every sidewalk found outside homes, stores or city blocks. What are sidewalks made of? is an assembly of cement, sand gravel and water mixed together and then reinforced for years of foot traffic, rainfall and heat exposure. However, concrete isn’t always what’s underfoot. Some walkways feature asphalt surfaces; others can feature brick designs; yet others still may use recycled rubber materials or recycled tire bits! Below we will outline which mix contractors typically utilize and when one or more alternatives might make more sense for your property. What Are Sidewalks Made Of? U.S. sidewalks, both those you maintain at your own house and those maintained by cities, are predominantly constructed out of concrete. A contractor is hired to mix cement, sand, crushed stone or gravel and water into a workable paste before pouring it onto wooden or metal forms for smooth surface quality and cutting joints into it so temperature changes don’t cause random fractures of its surface. Concrete remains popular due to its affordability compared to alternative paving materials and strength for everyday traffic conditions, along with reparability through individual slab replacement rather than all at once. But before proceeding further there’s one potential miscommunication we should address. Are Sidewalks Made of Concrete or Cement? Sidewalks are concrete surfaces, not cement as people often conflate them in everyday conversation. While people use both terms interchangeably, here’s the distinction: Cement is a fine grey powder on its own; however, it cannot support human footstep on its own. What it really serves for is acting as the glue; binding all other elements together when water is added to a mix. Portland cement is often found in American sidewalk mixes; thanks to this ingredient concrete can harden over the weeks following curing. Concrete is what’s created when cement is combined with other ingredients like sand, gravel and water – not an end result on your doorstep! So when contractors mention pouring “cement”, they mean concrete as no one walks on an endless stretch of cement powder! If a contractor uses that term when discussing walkway installations for you – and that contractor says they’re pouring “cement”, that actually refers to something quite different! What Is Concrete Made Of? (The Sidewalk Mix Breakdown) A standard sidewalk mix comes down to five ingredients, and each one is doing a specific job. Cement (Portland cement, usually): the binder that reacts with water and locks everything else together. Sand (fine aggregate): fills the gaps between the bigger rock particles and smooth out the texture. Gravel or crushed stone (coarse aggregate): the bulk of the mix, often 60 to 75 percent of the total volume, and where a lot of the slab’s strength comes from. Water: starts the chemical reaction that hardens cement. Too much water and you weaken the slab, which is why contractors pay attention to the water-cement ratio instead of just eyeballing it. Air-entrainment admixture: a chemical that creates microscopic air bubbles through the mix, giving frozen water inside the concrete somewhere to expand into. Standard in cold-climate states, less critical in Florida. Get the ratio off and you’ll see cracking or surface flaking within a year or two. Get it right and a sidewalk will realistically outlast the house it sits in front of, often 25 to 30 years with basically no maintenance. What Type of Concrete Is Used for Sidewalks? Most residential sidewalks are usually installed using a pressure of 3,000 PSI; some contractors may increase it up to 4,000 PSI for high traffic areas or extra durability. PSI measures how much pressure a slab can withstand before it cracks under strain; the higher number signifies stronger slabs at an increased cost. A typical residential mix specification looks something like this: Strength: 3,000 to 4,000 PSI Thickness: 4 inches under normal foot traffic, 5 to 6 inches anywhere a vehicle might cross it, like a driveway apron Slump: about 4 to 5 inches, a measure of how workable the wet mix is before it sets Reinforcement: wire mesh, rebar, or fiber mesh worked into the concrete Air entrainment: required where winters freeze and thaw, optional in warmer states Commercial sidewalks that need to meet ADA accessibility rules usually go up to a 5-inch minimum thickness, with tighter grading tolerances so the surface stays level for wheelchairs and walkers. Other Materials Sidewalks Can Be Made Of Concrete is the default, but it’s far from the only option out there, and depending on your budget or the look you’re going for, one of these might fit better. Asphalt Sidewalks Asphalt is bitumen mixed with crushed stone, basically the same stuff under most roads. It’s less expensive to install than concrete and has a bit of flex to it, which helps in spots where the soil shifts. The tradeoff is a shorter lifespan and the need to reseal every handful of years. Brick and Paver Sidewalks You’ll see brick pavers a lot in older neighborhoods and near heavily landscaped front yards. They’re set piece by piece into a sand or gravel base, which actually makes repairs simpler in one sense: you pull the damaged brick and drop in a new one instead of tearing out a whole slab. Natural Stone (Flagstone) Sidewalks Flagstone paths use flat, irregular stone pieces bedded in sand, gravel, or mortar. They look great, no argument there, but they cost more up front and need someone who actually knows what they’re doing to keep the surface even and safe to walk on. Gravel and Crushed Stone Paths The cheapest way to build a path, and it drains well, but loose gravel shifts underfoot over time and doesn’t meet ADA requirements. Fine for a garden path. Not something you’d want as a main entry walkway. Rubber Sidewalks Recycled rubber tiles flex around tree roots instead of cracking the way concrete does. A growing number of cities install rubber panels specifically near mature trees, because tree roots are one

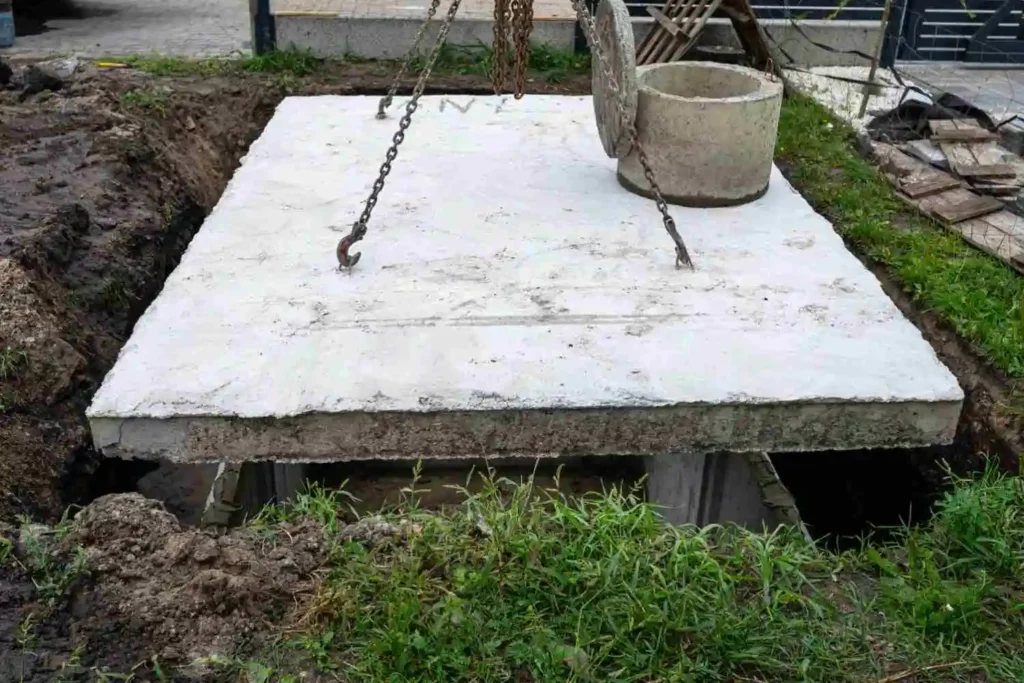
Heavy concrete slab with a manhole cover being installed, demonstrating how much a yard of concrete weighs.
Concrete

How Much Does a Yard of Concrete Weigh?

Short answer: about 4,000 to 4,050 pounds. Call it 2 tons. Break that down further and you’re looking at roughly 150 pounds for every cubic foot. It’s one of those numbers that sounds simple until you actually need it for something real, like figuring out if a delivery truck can reach your driveway, planning what a dumpster will hold after a demo job, or working out how much does a yard of concrete weigh? I’ve spent over 30 years pouring concrete around Central Florida, and this is one of those questions that sounds basic until you actually need the number for something. So let’s get into it, with real figures, not just the textbook average. What Is a Cubic Yard of Concrete, Anyway? A cubic yard is 3 feet by 3 feet by 3 feet. Do the math and that’s 27 cubic feet. Every ready-mix supplier in the U.S. prices and delivers concrete by this measurement, so it’s not just some abstract unit, it’s what shows up on your invoice. If it helps to picture it: think of a cube roughly the size of a large chest freezer. That’s about what one cubic yard looks like before a crew spreads it out into a concrete slab. Suppliers don’t sell by the bag or the square foot. They sell by the yard. That’s the number that matters. The Actual Weight Numbers (Not Just the Average) Here’s where people get tripped up. Concrete doesn’t weigh one fixed amount. It depends on whether it’s wet, cured, or already broken into chunks. Concrete State Weight per Cubic Yard Weight per Cubic Foot Wet, freshly mixed 4,000–4,050 lbs ~150 lbs Fully cured, dry 3,600–3,700 lbs ~135 lbs Broken/demo rubble ~2,025 lbs ~75 lbs If you’re working in metric, that’s roughly 1,830 kilograms per yard, or about 1.8 metric tons. The formula behind all of it isn’t complicated: Weight = Volume × Density. Multiply 27 cubic feet by about 150 pounds per cubic foot and you land close to 4,050 pounds. Every concrete weight calculator out there is built on that same math, ours included, when we’re pricing out a job. People often ask how much does a cubic yard of concrete weigh when they’re really trying to estimate a whole truckload. Just scale it up. Five yards runs close to 20,000 pounds, about 10 tons, since each yard adds around 4,000 pounds. So if the real question is how much does 5 yards of concrete weigh, now you know, and it’s also why a driveway pour almost always calls for a full-size mixer instead of a smaller truck. Does Curing Actually Change Weight? Most people assume wet concrete, loaded with water, must weigh a lot more than the same slab once it’s hard. It doesn’t, at least not by much. Here’s what’s actually happening. As concrete cures, water reacts with the cement through a process called hydration. A big chunk of that water gets locked into the hardened material rather than just drying away. Some surface moisture evaporates, sure, but the concrete is also getting denser as it sets. Those two things basically cancel each other out. It’s a small detail, but one that most calculator sites gloss right over. Bottom line: plan around the full weight whether the slab was poured yesterday or cured six months ago. The gap is small enough that it won’t throw off your delivery plan or your load calculations. What Actually Moves the Number That 4,000-pound figure is a starting point, not a rule carved in stone. A few things push it up or down. Aggregate type matters most. Standard mixes lean on gravel or crushed stone, which is where that 150-pound-per-cubic-foot figure comes from. Switch to a lightweight aggregate, like pumice or expanded clay, and you can knock the weight down 25 percent or more. Go the opposite direction with something like barite or magnetite, used for things like radiation shielding, and you’re pushing well past 6,000 pounds per yard. For a driveway, patio, or walkway, though, you’re basically always dealing with standard gravel aggregate. Water-to-cement ratio plays a smaller part. Add more water and the mix thins out a little, which lowers density slightly, but it also weakens the concrete. That’s why a good crew keeps that ratio tight instead of loosening it up just to make the pour easier to handle. Rebar and wire mesh add weight, but for a residential job, not much. A slab with standard wire mesh picks up maybe a few extra pounds per yard. On a heavily reinforced footing or a commercial foundation loaded with rebar, steel can tack on several hundred pounds per yard. Steel runs about 490 pounds per cubic foot, compared to concrete’s 150, so it doesn’t take much to add up. One more thing worth mentioning, and it’s a Florida-specific detail most guides skip: air entrainment. Contractors up north add tiny air bubbles to concrete so it can survive freeze and thaw cycles without cracking apart. That extra air makes the mix a bit lighter. Down here, freeze-thaw damage just isn’t something we deal with, so most residential mixes in Central Florida skip heavy air entrainment and stick closer to that full 150-pound figure. Small detail, but it’s the kind of thing that actually shows up in your numbers. Concrete Weight by Mix Type Mix Type Weight per Cubic Yard Common Use Standard (gravel aggregate) 3,700–4,220 lbs Driveways, patios, walkways, slabs Reinforced (with rebar) ~4,200 lbs Footings, retaining walls High-strength 4,200–4,500 lbs Commercial columns, structural work Lightweight 2,360–3,120 lbs Upper floors, weight-sensitive retrofits High-density 4,700–6,700+ lbs Specialty, industrial applications For almost every homeowner job we take on, the standard range is the one that applies. You’d have to be doing something unusual to land anywhere else on that chart. What This Looks Like on a Real Job Charts are fine, but they don’t mean much until you tie them to an actual project. So here’s what a handful of common jobs actually weigh out to. Project Approx.

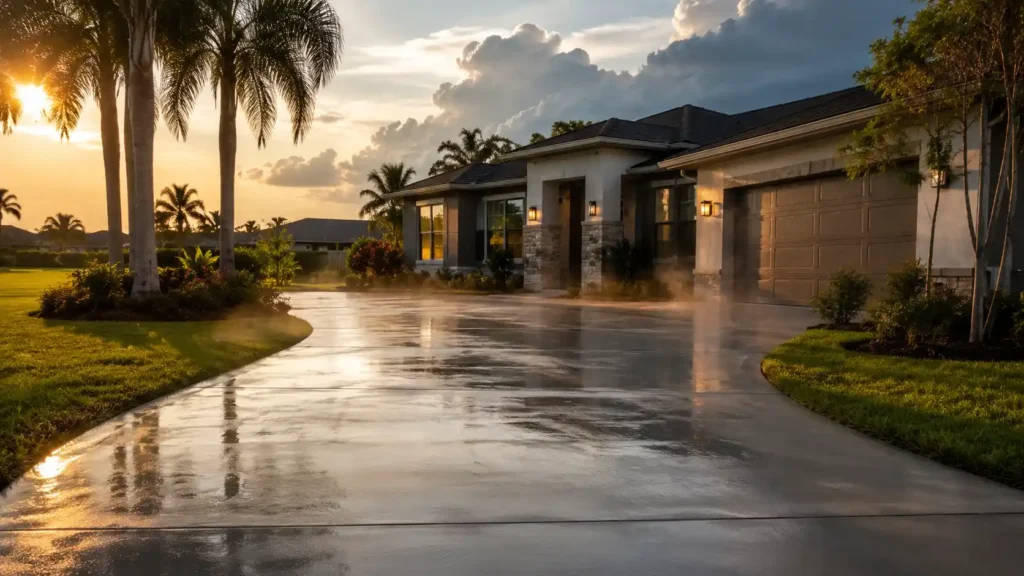
Freshly poured concrete driveway curing under the sun, showing how long does concrete take to dry.
Concrete

How Long Does Concrete Take to Dry

Step on your new driveway too soon and you could leave a footprint that’s there for the next 20 years. That’s not a scare tactic it’s just what happens when Florida heat tricks you into thinking concrete is ready before it actually is. If your driveway, patio, or walkway was just poured in Winter Springs, Oviedo, or Longwood, you’re probably standing at the window right now wondering how long does concrete take to dry before you can walk on it, park on it, or drag your patio furniture back into place. Here’s the real answer, built around Florida weather instead of a generic national chart. Quick Answer New concrete is safe to walk on in 24–48 hours, safe for cars in about 7 days, and reaches full design strength around 28 days. In Central Florida, heat dries the surface fast while the inside stays soft, and summer humidity or rain can stretch that timeline out even further. Drying and Curing Aren’t the Same Thing Here’s the thing most people miss: drying and curing are two completely different processes, and mixing them up is what causes most early cracking. Drying is just surface moisture leaving the slab. It’s what you can see and feel when you walk outside and touch the concrete. Curing is a chemical reaction called hydration water and cement molecules bond together to form crystals that lock the mix into a solid, load-bearing structure. That process runs for weeks, not hours, and it’s invisible from the surface. Think of it like a cake. The top can look golden and set the moment it comes out of the oven, but the center is still soft and needs time to finish baking. Concrete works the same way the surface tells you almost nothing about what’s happening a few inches down. This gap between “looks dry” and “is actually strong” is exactly why so many Florida driveways develop cracks in the first few weeks. The water-to-cement ratio your contractor uses also plays into this: a lower ratio cures stronger, but it dries the surface faster in the heat, which means the timing of your curing steps matters more here than it does in a cooler climate. Pro Tip: Ask your contractor what water-to-cement ratio they’re using before the pour. A ratio under 0.50 is generally considered strong for driveways carrying regular vehicle traffic. The Concrete Curing Timeline Here’s how strength builds over the full 28-day cure period the benchmark the concrete industry uses to judge a slab’s design strength. Timeframe What’s Happening Approx. Strength Day 0–1 Surface sets, needs full protection, no traffic at all Under 40% 24–48 hours Safe to walk on carefully 40–50% Day 2–6 Light foot traffic only, no heavy items 50–65% Day 3–7 Forms typically removed 65–70% 7 days Safe for cars and light trucks 65–75% Day 8–27 Slab keeps gaining strength daily 75–90% 28 days Full structural capacity reached 90–100% If you’ve been typing how long does concrete take to dry into Google at 11pm because you’re worried about your car sitting in the driveway too early this table is your answer in plain numbers. What Actually Changes Concrete Drying Time in Florida Florida weather doesn’t play by the same rules as the rest of the country, and that changes how you should think about timing. Heat Dries the Surface Too Fast Once temperatures climb above 90°F, surface evaporation speeds up dramatically. The top of the slab can look completely dry within hours but the hydration reaction underneath still needs steady moisture to keep working. When the top dries out ahead of the inside, you get: Shrinkage cracks across the surface A dusty, chalky top layer Weak spots that show up months later, not immediately Humidity Slows Internal Moisture Loss High humidity works in the opposite direction. It keeps surface moisture from escaping quickly, which sounds like a good thing but it also means the slab holds excess water longer than expected. Combine that with slab thickness and low wind, and a thick driveway pour during a humid stretch can take noticeably longer to reach a safe moisture level before flooring or sealing goes on top. Summer Thunderstorms Are the Real Risk Rain hitting the concrete within the first few hours can wash out the surface paste and leave a pitted, weak top layer behind and yes, this actually happens more than people expect during a typical Central Florida summer. After the first 24 hours, that risk drops off. But a hard storm during the first week can still soften unprotected concrete. If a pop-up storm looks likely, cover fresh concrete with plastic sheeting before you leave the job site not after the sky turns dark. Sandy Soil Changes How the Slab Cures From Below Central Florida’s sandy soil drains fast, which helps keep standing water off a compacted base. But that same fast drainage means the ground can pull moisture out of the bottom of a slab unevenly. A properly graded, well-compacted base helps the concrete cure evenly from top to bottom skip that step and you’re looking at a slab that dries unevenly and cracks along uneven stress points. How Long Different Concrete Projects Take to Dry Not every project follows the exact same clock. Here’s how the timeline shifts depending on what’s going in the ground. Concrete Driveways Driveways carry the heaviest load of anything on this list, so the full 7-day wait for passenger vehicles matters most here. Hold off on anything heavier an RV, a moving truck, a dumpster delivery until you hit the full 28 days. Concrete Patios Patios see lighter use, mostly foot traffic and furniture. You can typically walk on a new patio within 24–48 hours, but wait at least a week before setting furniture back down. Put a table out too soon and you’ll press leg marks straight into the surface. Concrete Walkways Sidewalks and walkways cure the same way patios do. Light foot traffic within two days is fine, but skip dragging heavy planters or

Scroll to Top