Ron Hodges Inc

Concrete

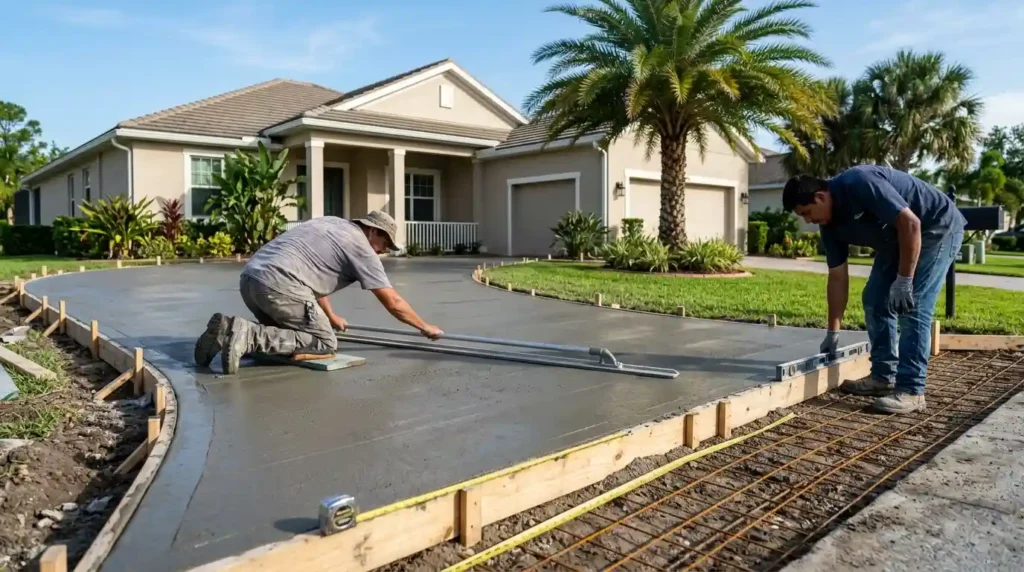
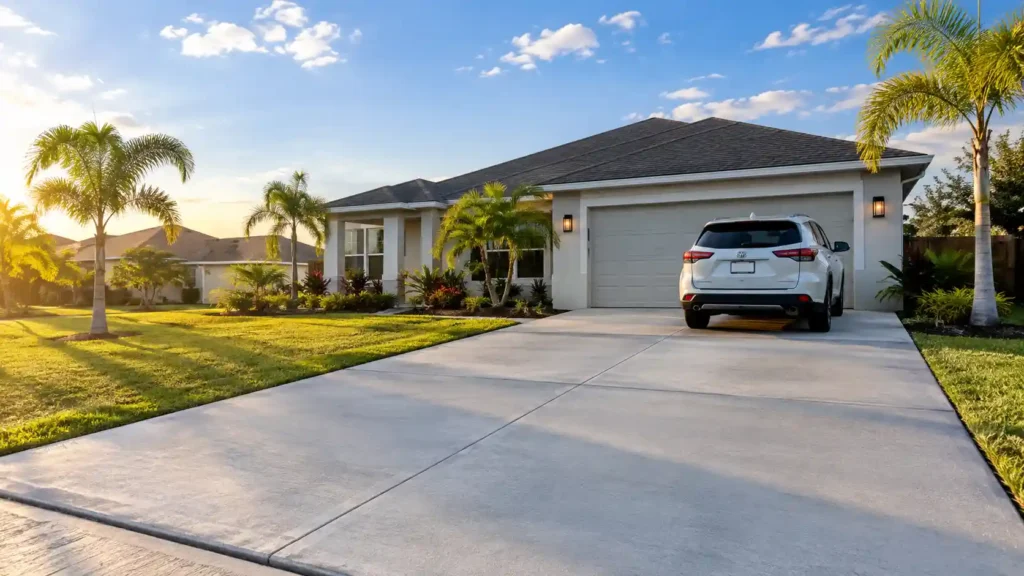
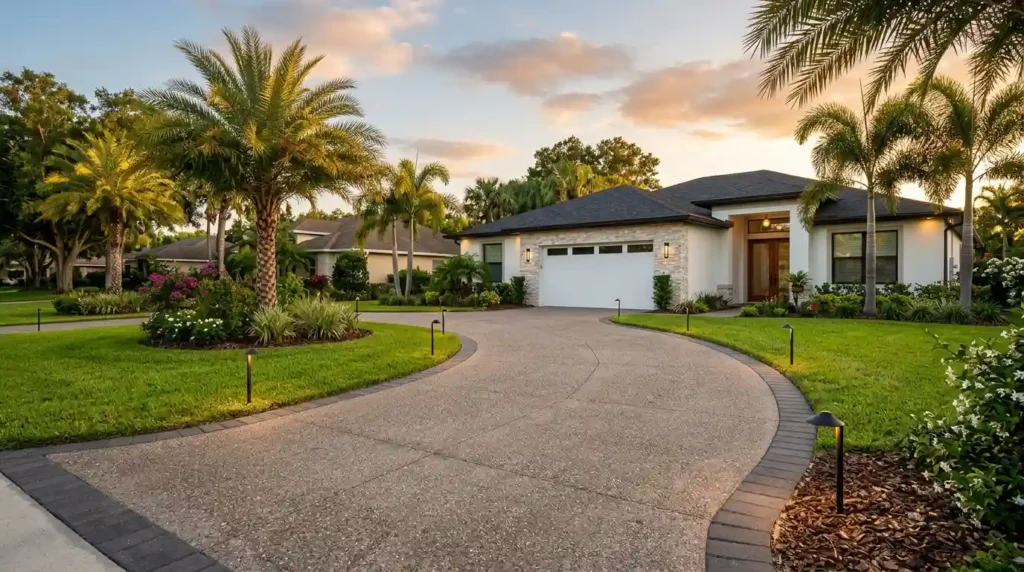
Modern concrete driveway with paver border at a Florida home
Concrete

What Is the Latest Trend in Driveways? Modern Concrete and Paver Ideas

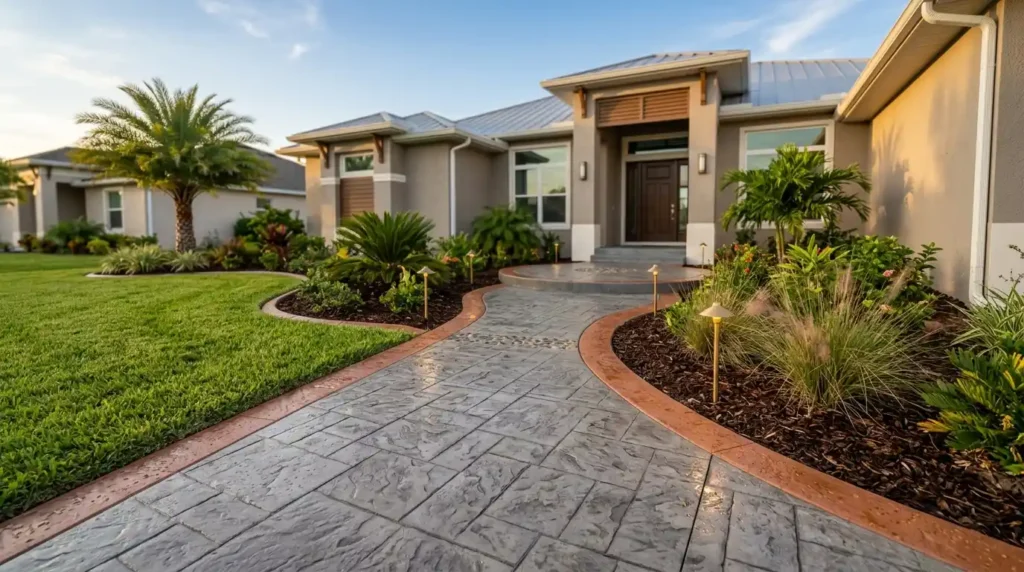
The latest trend in driveways is a mix of materials, clean lines, and low-fuss finishes. Think wide concrete slabs with paver borders, soft textures, warm gray tones, and designs that handle heavy rain. Homeowners want a driveway that looks good from the street and works hard every day. Below, you will find the styles that stand out right now, plus tips for choosing one that fits a Florida home. What Is the Latest Trend in Driveways Right Now? Right now, the biggest shift is away from the plain gray slab. People want driveways with character, but they still want easy care. Here is the short list of what is trending: Stamped and textured concrete that copies stone or slate Exposed aggregate finishes with a natural pebble look Large-format pavers with tight, clean joints Mixed materials, like concrete with paver bands Warm neutral colors instead of stark gray Wider drives with gentle curves Built-in lighting and edge details Each of these gives a home a fresh look without feeling fussy. We will go through them one at a time. Modern Driveway Design Ideas Homeowners Love Modern driveway design ideas share one thing: simple shapes with a few smart details. The goal is a driveway that feels planned, not just poured. Clean edges and straight lines. A crisp border or a saw-cut grid pattern gives a plain slab a tailored look. It costs little and changes a lot. Gentle curves. A soft curve from the street to the garage looks welcoming. It also breaks up a long, flat stretch of pavement. Wider parking pads. More families own two or three cars now. A side pad or a wider apron near the garage keeps cars off the lawn. Landscape strips. A narrow strip of turf or gravel between two concrete tracks is a popular choice. It adds green space and helps with drainage. Just plan the width with care so tires do not crush the edges. Soft lighting. Small low lights along the edge make the drive safer at night. They also show off the texture of the surface. Latest Concrete Driveway Trends The latest concrete driveway trends focus on finish and color. Concrete is still the top pick for many homes because it is strong, simple, and fits almost any style. Exposed aggregate. The top layer is washed away to show the small stones inside. The result is a natural, grippy surface that hides dirt well. It also gives good traction when the pavement is wet. Broom finish with a border. This is the classic look, upgraded. A light broom texture in the center and a smooth or contrasting border make it feel custom. Colored concrete. Charcoal, warm tan, and soft taupe are replacing bright white and stark gray. Darker tones can get hot in the Florida sun, so lighter warm shades are often the smarter pick. Saw-cut patterns. Large squares or rectangles cut into the slab look modern. They also control where cracks form, which helps the driveway age well. Smooth, sealed finishes. A satin seal brings out the color and makes cleanup easier. Too much gloss can turn slick, so most pros stick with a low sheen on driveways. If you are weighing the basics first, our guide on how thick a concrete driveway should be explains what keeps a slab strong for the long run. Stamped Concrete Driveway Trends Stamped concrete driveway trends lean toward natural stone looks and subtle color. The days of loud, busy patterns are fading. Slate and flagstone patterns. These give a rich, rustic feel. They work well on homes with stone or stucco fronts. Large-format stamps. Bigger tile patterns look cleaner and more modern than small cobblestone designs. Soft two-tone color. Instead of one flat shade, crews layer a base color with a lighter or darker accent. This makes the surface look like real stone. Stamped borders only. Many homeowners now keep the center plain and stamp just the border. It gives the look for less work and less upkeep. Stamped work depends a lot on the crew. The timing, the release agent, and the seal all affect how it turns out. A good finish should look natural, not stiff. Plan on resealing every few years to keep the color rich. Modern Paver Driveway Designs Modern paver driveway designs are about big shapes, tight joints, and calm color. Pavers give you the look of a high-end drive with strength you can repair one piece at a time. Large-format pavers. Bigger pavers mean fewer joints and a sleek look. They suit modern homes with clean lines. Linear and running bond patterns. These straight patterns feel sharp and current. Herringbone is still strong for driveways, since it locks well under weight. Soft gray and warm sand tones. These shades match most roofs and paint colors. They also hide dust and light stains. Paver borders on a concrete drive. This is one of the most popular combos. You get the budget-friendly strength of concrete and the style of pavers where the eye lands first. Water-friendly paver systems. These have wider joints or open cells filled with small stone. They let rain soak into the ground instead of running into the street. That matters in Central Florida, where storms can dump a lot of water fast. Our concrete driveways in Winter Springs FL team builds drives with the right base so pavers stay level for years. Concrete vs. Pavers vs. Stamped: Quick Comparison Style Look Upkeep Best For Plain or broom concrete Simple, clean Low Budget-minded homeowners Exposed aggregate Natural, textured Low Grip and a stone look Stamped concrete Stone, slate, brick look Medium (reseal) Curb appeal on a budget Pavers High-end, flexible patterns Medium (sand, sealing) Easy repairs and custom looks Concrete with paver border Custom, balanced Low to medium Best of both worlds Prices vary by size, site, and design, so we give a written quote after seeing your property. Any number found online is only a rough guide. Which Driveway Trend Fits a Florida
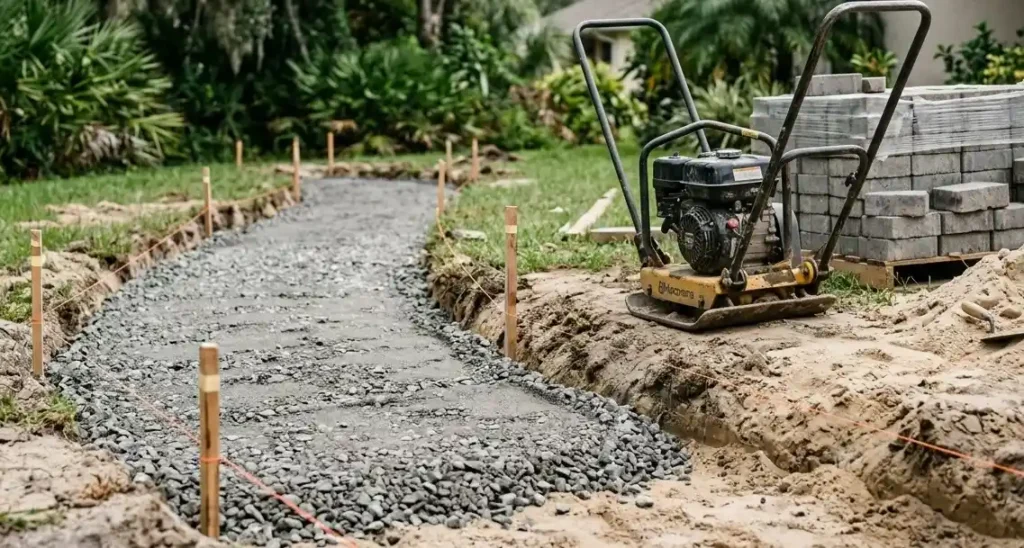
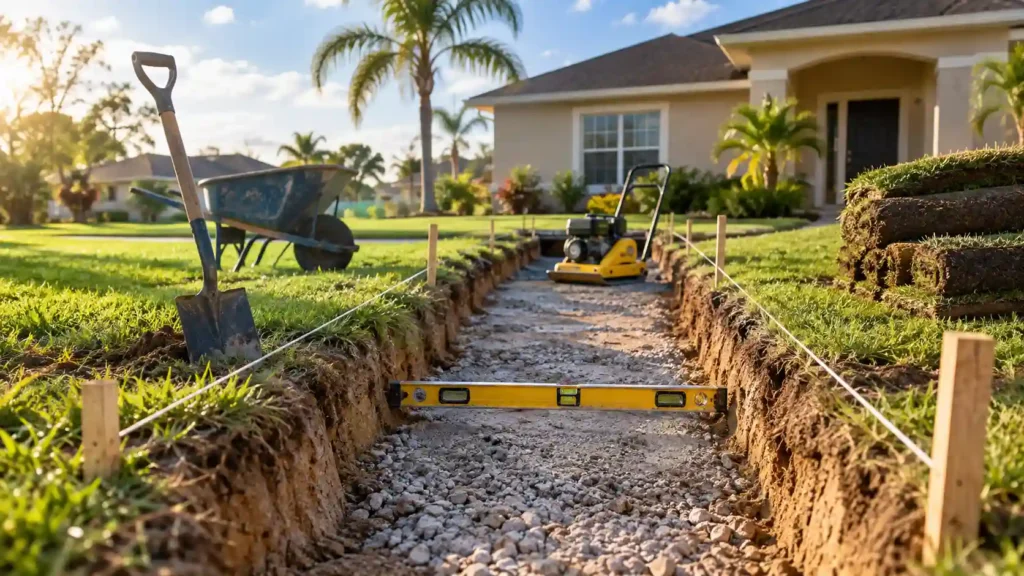
ravel base prep for a curved walkway construction with a plate compactor beside stacked.
Concrete

How to Remodel a Walkway: Steps, Costs, and Options

A cracked and uneven walkway is unsightly and hazardous to walk on‚ collecting water and indicating general neglect of your front yard․ If you’re wondering how to remodel walkway? Options for improving walkway surfaces include repair‚ resurfacing‚ or replacement‚ depending on the condition of your current walkway․ This article from Ron Hodges Inc outlines repair and treatment options and other considerations‚ the repair process‚ and materials and other factors that can affect repair costs․ What Does It Mean to Remodel a Walkway? To renovate a pathway means to repair or rebuild all or portions of it for safety and appearance․ Minor repairs to a pathway may include fixing cracks․ Resurfacing a pathway means adding a new layer to an otherwise intact pathway․ Full replacement of a pathway includes demolishing the old pathway and constructing a new one․ Most asphalt damage results from soil issues․ Tree roots heave an asphalt sidewalk‚ washed-out soil leaves voids‚ and unstable soil can cause the sidewalk to settle․ Tips for repairing an old sidewalk include identifying the cause of the damage․ Tips for repairing a sidewalk depend on the cause of the damage․ Should You Repair, Resurface, or Replace Your Walkway? Match the damage to the fix. Surface flaws can be patched. Base problems cannot. Condition Best Fix Hairline cracks under 1/4 inch, no movement Repair: clean and fill with flexible crack filler Faded, stained, or flaking surface on a solid slab Resurface: overlay, or stain and seal Cracks wider than 1/4 inch with one side higher Replace the damaged section Sunken or tilted sections Replace and rebuild the failed base Water pooling or running toward the house Replace with a corrected grade Lips or edges over 1/4 inch (trip hazards) Replace the section If damage shows up all over the path, replace the whole thing. Patching one spot at a time just moves the problem down the walkway. How to Remodel a Walkway Step by Step Here is how to remodel walkway projects from start to finish, using the full replacement route. Step 1: Plan the Layout, Width, and Slope Mark the path with string or spray paint. Aim for at least 36 inches wide. At 48 inches, two people can walk side by side. Plan a 2% grade (about 1/4 inch of drop per foot) so water runs off the sides and away from the house. Step 2: Remove the Old Walkway Break old concrete into pieces with a jackhammer or sledgehammer, or lift pavers by hand. Line up concrete disposal before you start. Skipping demolition buries old problems under a new surface. That’s how to redo a concrete walkway the right way: all the way down. Step 3: Fix the Grade and Drainage Watch where water goes in a heavy rain. Regrade low spots, move downspout outlets, and clear roots or irrigation lines that sit in the way. The finished path must shed water away from your foundation. Step 4: Excavate and Compact the Base Dig out soft soil and any leftover rubble. Add about 4 inches of gravel base in thin layers and run a plate compactor over each one. Pavers also need about 1 inch of bedding sand on top. Our guide on How to Excavate Lawn for Walkway covers depth and digging in detail. Step 5: Install the New Surface For pavers, screed the sand flat, lay your pattern, and cut edge pieces with a wet saw. For concrete, set forms, pour, level, and finish with a broom texture for grip. Walk on new concrete after about 24 to 48 hours. Want to see what that work involves? Step 6: Set Edging, Fill Joints, and Seal Install edge restraints so pavers can’t spread. Sweep polymeric sand into the joints, compact, and mist lightly. Once the surface has cured, apply sealer to protect the color and slow stains. Best Walkway Materials for a Remodel These walkway replacement ideas cover the five materials homeowners ask about most. Material Look Durability Upkeep Cost level Poured concrete Clean and simple Strong, but can crack Seal, fill cracks Low to medium Stamped concrete Mimics brick or stone Strong, color can fade Reseal often Medium Interlocking pavers Many colors and patterns Strong, flexes with shifting soil Re-sand joints, wash, seal Medium to high Natural stone Rich and one of a kind Very durable Moderate High Gravel Casual and loose Stones migrate Rake and top up Low Pavers do well on Florida soil because each unit can move and be reset. A cracked paver gets swapped. A cracked slab needs a section replaced. If budget leads your decision, read What Is the Cheapest Type of Walkway. Walkway Remodel Ideas That Boost Curb Appeal These concrete walkway remodeling ideas also work for pavers. Patterns Herringbone locks tight and handles heavy foot traffic. Running bond is simple, classic, and quick to lay. Colors and Borders Pick a tone that matches your roof and trim. A darker border frames the path and hides edge wear. Curves vs Straight Paths A straight path is direct and costs less. A gentle curve softens a front yard but adds cuts and labor. Width and Lighting A 48-inch path feels welcoming. Low-voltage lights along the edges make steps safer at night. How Much Does It Cost to Remodel a Walkway? Cost depends on how big the path is, how much comes out, and what goes back in. These are the main factors: Factor Pushes Cost Up Keeps Cost Down Square footage Long, wide path Short, narrow path Demolition Thick or reinforced concrete Simple lift-out of pavers Base prep Soft soil, drainage fixes Firm, level ground Material tier Natural stone, stamped finishes Plain concrete, gravel Labor Curves, patterns, borders Straight runs Site access Tight gates, no equipment room Open yard, easy delivery We don’t print per-square-foot prices here because they swing with each site. An on-site quote gives you a real number for your yard. Remodeling a Walkway in Central Florida Our weather is hard on walkways. Heavy summer rain pushes water under

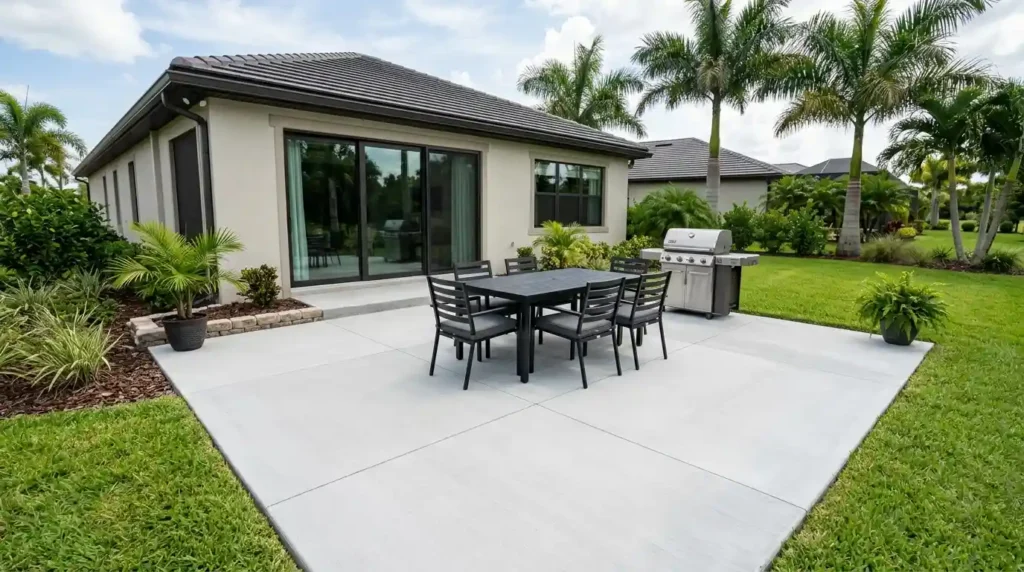
Modern concrete patio with dark outdoor dining table, six chairs, stainless steel grill, and palm trees.
Concrete

What Does a Patio Mean? Uses, Types, and Materials

Ask ten homeowners what a patio is and you’ll get ten slightly different answers. Some picture a brick courtyard, others a plain concrete slab with a grill parked on it. So what does a patio mean? It’s a paved spot on the ground outside your house where you can sit, eat, and hang out. At Ron Hodges Inc, we’ve been pouring slabs and setting pavers around Winter Springs, Oviedo, and Longwood for over 30 years. Here’s the plain-English version of what a patio is, what it’s for, and how to pick one that fits your yard. What Does a Patio Mean? A patio is a paved area on the ground, right next to your home, usually with no roof. That’s it. No raised floor, no walls. The word is Spanish. It first meant an inner courtyard, the open-air space in the middle of a house. Over time, Americans stretched it to cover just about any paved spot out back. If it sits on the ground and it isn’t wood, call it a patio and nobody will argue. What Is a Patio Used For? Mostly eating and sitting around. In our experience the grill goes out first and the furniture follows. But a good patio ends up doing a lot more: A fire pit corner with a few chairs A dinner table under an umbrella or pergola Pots and herbs close to the kitchen door A flat spot where kids can ride bikes or draw with chalk A place to park a hot tub or a couple of loungers by the pool What Is the Purpose of a Patio? Think of it as the bridge between kitchen and your yard. Without one, you’re dragging chairs across grass that never sits flat, and your shoes carry in whatever the lawn is holding. A patio gives you a firm, level place to stand. In Central Florida it also gives you somewhere dry after a summer downpour, when the lawn acts like a sponge. What Are the Different Types of Patios? Most patios get their name from what’s under your feet. Here’s a quick tour: Concrete: One poured slab. Plain, stamped, or colored. Pavers: Individual pieces set on sand. Picture a puzzle you can fix one piece at a time. Brick: The classic. Herringbone looks great but takes patience to lay. Natural stone: Flagstone and its cousins. Every piece is different. Gravel: Loose stone over a compacted base. Quick to install, though chair legs wobble on it. Covered or screened: Any of the above, plus a roof or screen. In Florida, the screened version is often called a lanai. Courtyard: A patio hemmed in by walls on a couple of sides. What Is a Concrete Patio? A concrete patio is a slab poured in place over a prepared base. One piece, one surface, done. Here’s why people like it. It usually costs less than paver, it’s smooth enough to roll a cart across, and you can color or stamp it to mimic stone. The catch is cracks. Concrete doesn’t bend, so if the ground underneath move, the slab can split. A solid base and well-placed control joints help a lot. No slab is crack-proof, though. How Is a Concrete Patio Built? Mark out the shape and dig the area down. Lay and compact a gravel base. This is the step people skip, and it shows a few years later. Build the forms and add reinforcement. Pour, level, and finish the surface. Cut control joints and let the slab cure. How deep should the slab be? That depends on how you’ll use it, and we break it down in How Thick Should a Concrete Patio Be. If you’d rather hand the whole job off, that’s what our concrete patio installation crew does. What Is a Paver Patio? A paver patio is built from individual units, usually concrete, brick, or stone, set over compacted base and a bed of sand. More sand gets swept into the joints to lock everything together. Pavers make sense around here for a simple reason. Florida soil is sandy, and sandy soil shifts. Pavers can move with it a little. If one stains or sinks, you lift it out, fix the base, and drop it back in. Try doing that with a slab. They do want more attention, though. Joint sand washes out. Weeds find loose joints. And Florida humidity grows green stuff on anything damp. Regular cleaning keeps them looking sharp, and our guide on How to Clean a Paver Patio shows how to do it without wrecking the surface. What Materials Are Used to Build a Patio? Pick a material based on the look you want, the upkeep you’ll put up with, and your budget. Material Look and feel Upkeep Good fit Poured concrete Smooth, can be stamped or colored Seal now and then, repair cracks Large areas, tight budgets Concrete pavers Many shapes, colors, and patterns Refill joint sand, clean, reseal Sandy soil, easy repairs Brick Warm, classic look Watch joints and moss Traditional homes Natural stone Rich, uneven texture Occasional cleaning and sealing High-end looks Gravel Loose and casual Rake and top up stone Fire pit areas, simple spaces Whatever you choose, put your attention on what’s underneath. A good patio sits on well-compacted ground with a slight slope away from the house, so rain runs off instead of pooling by your back door. And if you’ll be out there barefoot, go with a lighter color. Dark surfaces get hot in July. What Is the Difference Between a Patio and a Deck? A patio sits on the ground. A deck is raised, built from wood or composite, and attached to the house. Decks earn their keep on sloped lots, or when your back door sits well above the yard. On level ground, a patio is usually the easier call. No boards to stain, and no rot to watch for in humid weather. What Is the Difference Between a Patio and a Porch or Terrace? A porch

Two professional workers smoothing and leveling freshly poured residential concrete driveway. How Much Does a Concrete Contractor Charge?
Concrete

How Much Does a Concrete Contractor Charge?

Most concrete contractors charge $4 to $20 per square foot for driveways, patios, and walkways. Your final price depends on size, site prep, slab thickness, and finish. Some contractors quote by the square foot. Others bill by the hour or give one fixed price for the whole job. So, how much does a concrete contractor charge for your yard? This guide shares 2026 national price ranges, a worked example, and a simple way to compare estimates side by side. How Much Does a Concrete Contractor Charge on Average? No single rate fits every job. Most residential concrete work between $4 and $20 per square foot. A plain slab sits closer to $6 to $12. The average cost of concrete work climbs fast when the site needs extra prep or a fancy finish. Contractors use three main pricing methods: Method Best for What it usually covers Typical national figure Per square foot Driveways, patios, walkways Forms, concrete, labor, basic finish $4 to $20 per sq ft Hourly rate Repairs, small jobs, extra labor Labor only, materials billed apart $50 to $75 per hour Fixed estimate Full projects An agreed scope from start to cleanup Small walkway $800 to $2,500; two-car driveway $2,400 to $8,600 and up Concrete installation cost is not the same as the price of concrete. The mix is sold by the cubic yard and arrives in a ready-mix truck. A finished slab also needs forms, a base, labor, finishing, and cleanup. A concrete contractor hourly rate is a billing rate, not a paycheck. The Bureau of Labor Statistics tracks cement mason pay. One cost guide built on that data shows a median near $28 an hour. After taxes, insurance, tools, and profit, it estimates billed rates of $56 to $65. What Factors Affect the Cost of Hiring a Concrete Contractor? Two jobs with the same square footage can price very differently. Here is why. Materials and Labor Ready-mix delivery, forms, placement, and finishing all take time and money. Angi puts concrete labor cost per square foot for patios at $5 to $15. Small pours may add a short-load fee, since trucks charge extra for partial loads. Remember that a billing rate also pays for insurance, the truck, and tools. Site Preparation and Excavation Grading, excavation, and base prep come before any concrete. Soft soil needs more compaction or extra gravel. Removing old concrete costs $2 to $6 per square foot. A slab poured on a weak base will crack, so this step protects your money. Concrete Thickness, Reinforcement, and Finish Use sets the design. A patio needs less strength than a driveway that holds trucks. Going to 5 inches adds about 20% to the concrete cost but lifts load capacity nearly 50%. Rebar or wire mesh adds cost too. Stamped or colored finishes run $8 to $30 per square foot because they need more material and time. Project Size and Accessibility Big pours spread setup costs, so the price per square foot often drops. Small jobs cost more per foot. Tight gates, steep yards, and long hauls from the truck can call for a pump or extra hands. How Much Does Concrete Work Cost for Different Projects? Project type changes the math. Here are the three main jobs homeowners ask about. Concrete Driveway Installation Cost Plan on $6 to $16 per square foot, or about $1,885 to $6,475 in total, based on LawnStarter’s 2026 data. Size matters, but so does what sits under the surface. Removing an old driveway, adding base rock, setting rebar, and fixing drainage all add cost. A simple pour on level ground costs less than one on a slope. Good drainage is not optional. Concrete Network notes the Portland Cement Association advises sloping at least 1/8 inch per foot away from the house. Want more detail? Read our guide on How Much Does It Cost to Pave a Driveway. Concrete Patio Installation Cost A plain gray patio runs about $4 to $9 per square foot. Decorative work can reach $30. Patio size, ground conditions, access, and finish drive the price. A basic patio is a broom-finished slab. A decorative patio adds color, stamping, or exposed aggregate, and each step adds labor and time. Paver patios cost more, at $8.65 to $16.65 per square foot. See How Much Does a 20×20 Paver Patio Cost to compare. Concrete Walkway and Slab Installation Cost Walkways cost about $6 to $12 per square foot, and the national average is near $1,620. Length, width, curves, and access all count. Curves need more forming. Slabs for sheds or garages also run $6 to $12 per square foot. Their thickness and reinforcement depend on the weight they will carry. Project Typical installed range (national) Common extras Driveway $6 to $16 per sq ft Removal, base, rebar, drainage Patio $4 to $9 plain, up to $30 decorative Stamping, color, sealing Walkway $6 to $12 per sq ft Curves, grading, removal Slab $6 to $12 per sq ft Thicker pour, rebar Worked example (illustrative only): A 20 ft by 20 ft driveway is 400 square feet. At $6 to $16 per square foot, that is $2,400 to $6,400. Add old concrete removal at $2 to $6 per square foot, or $800 to $2,400. The total lands between $3,200 and $8,800. This leaves out permits, drainage work, sealing, and decorative finishes. It uses national rates, not a local quote. Why Do Concrete Contractor Estimates Differ? Two bids for the same driveway can sit thousands of dollars apart. Check the scope first. One estimate may include excavation, demolition, and haul-away. Another may skip them. Contractors may pick different base depths, thickness, reinforcement, or finishes. Equipment, delivery, cleanup, permits, and drainage work may be handled differently. Schedule, warranty coverage, and payment terms also change the value of an offer. A low bid often leaves something out. Compare written estimates for the same scope of work, not just the bottom line. In Florida, ask to see a license and proof of insurance. You can check licenses

What Are Some Creative Ideas for Concrete Paths?
Concrete

What Are Some Creative Ideas for Concrete Paths?

The best creative ideas for concrete paths are stamped patterns, stained color, exposed aggregate, gentle curves, and inlays like pebbles or tile. Each one turns a plain gray strip into a feature that fits your home. Most cost only a little more than a basic pour. Some add real grip underfoot, and some add color that lasts for years. So what are some creative ideas for concrete paths that work in a Florida yard? This guide covers what each idea costs in effort, how it holds up in rain and sun, and which one fits your house and your budget. Quick Answer: Best Creative Concrete Path Ideas Here are ten concrete walkway ideas that homeowners ask about most: Stamped concrete: looks like brick, slate, or cobblestone. Stained or colored concrete: adds warm, rich color. Exposed aggregate: shows natural pebbles with a nonskid top. Curved or winding path: softens edges and follows garden beds. Grid or saw-cut patterns: scored squares for a clean look. Stepping stone slabs: big slabs with gravel or grass gaps. Pebble, tile or shell inlays: small mosaic accents. Bordered path: a stamped or colored band along the edges. Concrete with pavers or brick: concrete strips with paver inserts. Lit path with steps and landings: low lights and a round landing. 10 Creative Concrete Path Ideas These are also the most popular decorative concrete walkway ideas we get asked about. Each one has a look, a best use, and one real catch. Stamped Concrete (Brick, Slate, Cobblestone) A stamped concrete walkway looks like brick, slate, or cobblestone, but it is one poured slab. Crews press stamp mats into wet concrete, then dust on color release so the pattern shows depth. It suits front entries where you want a stone look without paying for stone. The catch is timing. The stamping window is short, and the sealer needs a fresh coat every few years. Stained or Colored Concrete A stained concrete walkway gives you warm tan, rust, or soft gray tones. Integral color is mixed into the whole batch, so a chip does not show a gray core. Surface stain soaks into the top layer and can look richer, but strong sun can fade it. Both types need resealing, and surface stain shows every old patch underneath. Exposed Aggregate An exposed aggregate walkway shows the small pebbles inside the concrete. Crews wash off the thin top layer soon after the pour, which reveals the stones. The rough, nonskid surface gives good grip, so it works well near pools. The catch is comfort. It feels bumpy on bare feet, and leaves and dirt settle in the texture. Curved or Winding Path A curved concrete walkway follows your garden beds and gives the yard soft edges. Crews bend flexible forms to set the curve before the pour. Among all concrete garden path ideas, this one fits yards with trees, pool edges, or side gardens best. The catch is cost. Curves take more formwork and more time than a straight run. Grid or Saw-Cut Patterns Scored squares give plain or colored concrete a clean, modern look. Crews cut control joints on a grid, often in 3 ft by 3 ft panels. Those cuts also guide cracks to the lines, where they hide. The catch is timing again. Cut too late and the slab cracks first, and cut too shallow and the joint does nothing. A good rule is about one quarter of the slab depth. Large Slab “Stepping Stone” Look With Gravel or Grass Gaps Big square slabs with gravel or grass between them make a modern concrete walkway. Staggered slabs with dark gravel in the gaps add strong contrast. This look suits clean-lined homes and low-water yards. The catch is the steel and base. Rebar does not run across the gaps, so each slab needs its own steel and a well-packed base, or it will rock. Pebble, Tile or Shell Inlays Embedded stones, terra-cotta tile, or shell pieces add small mosaic accents. Many homeowners place one near the front door or at a path bend. Crews press the pieces into wet concrete or set them in a cut recess. The catch is grip and hold. Glazed tile gets slick when wet, and loose pieces can pop out if they are set too late. Bordered Path (Stamped or Colored Band) A band along each edge frames the path and makes a plain center look planned. Use a stamped band, a colored band, or a paver border in a contrast shade. It works well on long walks from the street to the door. The catch is color matching. A band that is too close to the center looks like a mistake, and one that is too far looks heavy. Concrete Mixed With Pavers or Brick A concrete paver walkway can use concrete strips with paver or brick inserts. The concrete carries the load, and the pavers add color and pattern. It suits people who like pavers but want fewer loose joints and a lower price than an all-paver path. The catch is the seams. Edges must be clean, and the pavers can settle over time. Lit Path With Steps and Landings Low path lights or built-in riser lighting make a walk safe at night. A curved step or a round landing circle also breaks up a long run. This idea suits sloped yards, front steps, and paths to a pool deck. The catch is planning. Wire and conduit must go in before the pour, or you will cut into finished concrete later. How to Choose the Right Idea If you are still asking what are some creative ideas for concrete paths that fit your budget, start with three things. Pick your slip grip first, then your upkeep level, then your look. A good concrete walkway design starts with how the path is used, not with a photo. For a tight budget, scored squares and a simple border cost the least. For house style, a stamped pattern suits a traditional home, while stepping

Can You Pour New Concrete Over Old Concrete
Concrete

Can You Pour New Concrete Over Old Concrete?

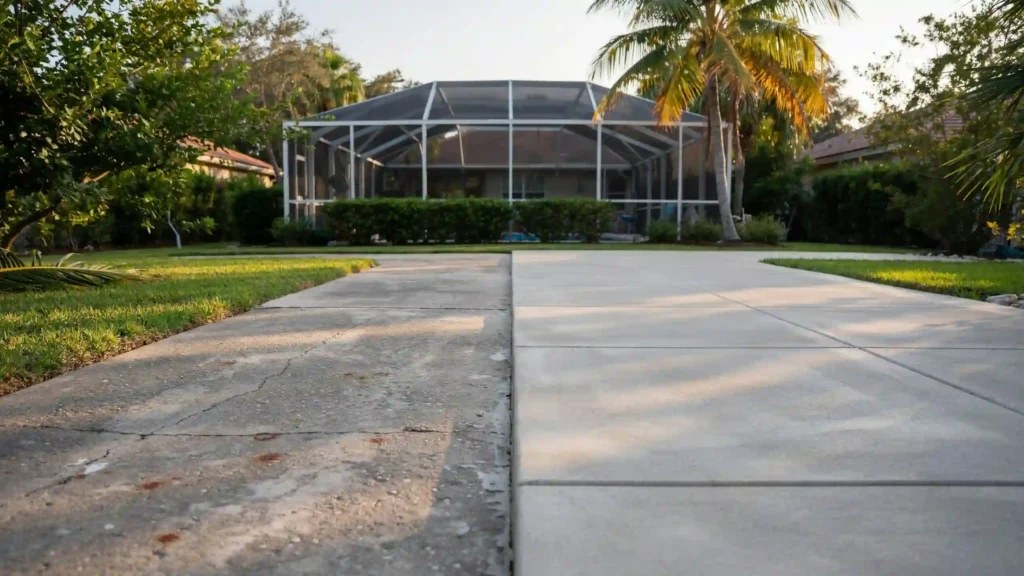
So, can you pour new concrete over old concrete? Yes, you can pour new concrete over existing concrete, but only if the original slab is sturdy, stable and not sinking. Concrete doesn’t naturally bond to itself, so any existing shifting or structural faults will immediately punch through the new layer. It’s a quick, cost-effective solution for minor surface wear, but it won’t repair major foundation or drainage issues. For best results, pressure-wash or grind the previous surface thoroughly clean and then add a liquid bonding agent if your new layer is less than three inches thick. Finally, be sure that the increased height will not block doorways or mistakenly slope rainwater toward your home. When Can You Pour New Concrete Over Old Concrete? When the old slab is a good base, pouring concrete over concrete is the way to go. Think of it as the floor underneath your new layer. The new layer is supported by a sturdy floor. It’s shredded by a shifting floor. Thus the condition of the slab matters more than the slab age. A 30-year-old slab that is tight and flat can be overlaid. Cannot sink a 5-year-old slab. Signs the Existing Slab May Be Suitable It is solid. Tap it with a hammer. A clear ring is good. A dull, hollow thud means loose concrete. It is stable, with no major settlement or movement. The damage is cosmetic: light stains, surface wear, or hairline cracks. There is no widespread crumbling or flaking. Water runs off and does not pool. When Pouring Over Old Concrete Is a Bad Idea Major cracks, wider than about 1/4 inch or with one side higher than the other Sinking slabs Heaving slabs, often lifted by tree roots Soft or washed-out soil underneath Severe spalling, where the surface flakes off in chunks Crumbling across most of the slab Water that drains toward your house or sits in low spots Central Florida has no frost heave, but sandy soil and heavy summer rain wash out the ground under slabs. Oak roots lift them. The damage looks the same. Can You Pour Concrete Over Cracked Concrete? Yes, you can pour concrete over fractured concrete, but the existing slab must be stable. Small, non-moving hairline cracks can be easily patched in before the new coating is applied. But active or settling cracks those with an uneven, changing or expanding surface are warning indications of significant trouble. Old cracks will open up to the new surface at the same location (this is called reflected cracking). The new layer will migrate with the old one. To achieve an effective overlay , the surface must be extensively cleaned and manually roughened . A bonding agent must also be used to attach the layers. You also have to tie the old control joints into the new concrete to deal with movement. Since an overlay moves with whatever it covers, no contractor can promise it will hide structural cracks indefinitely, thus uneven, shifting slabs usually require a full replacement rather than a cover-up.  What Happens If You Pour Concrete Over Bad Concrete? New concrete over an old concrete slab in poor shape fails in predictable ways: Old cracks come back through the new layer. Low spots and uneven edges stay. Settlement keeps going, and the new layer sinks with it. The new layer cracks on its own. The layers separate, and the top peels or sounds hollow. Drainage problems stay in place. Extra height blocks doors, garage openings, or steps. You pay for new concrete and still have the old problem. How to Prepare Old Concrete Before Pouring New Concrete Prep decides whether the new layer lasts. Skipping it is the top reason overlays fail. 1. Inspect the Existing Slab Walk the whole slab. Look for cracks, sinking, and lifted edges. Tap for hollow spots. Press on the edges for soft soil. Run a hose and watch where the water goes. 2. Clean the Surface Remove dirt, oil, grease, paint, sealers, moss, and leaves. A pressure washer and a degreaser handle most of it. Paint and sealer often need grinding. Pros clean off grease, oil, paint, and weak concrete before a bonded topping, according to the American Society of Concrete Construction’s guidance on slab-over-slab work (source: Journal of Light Construction) 3. Repair Damaged Areas Fill hairline cracks with a crack filler. Patch spalled spots with repair mortar. Cut out loose concrete. Fill low spots so the slab is reasonably flat. 4. Roughen the Surface When Required A smooth, slick slab gives the new layer nothing to grab. Grinding, scarifying (scratching the top with a machine), or shot blasting adds grip. For thick bonded toppings, pros may roughen the slab to about 1/4 inch ridges. Sweep or vacuum all the dust off afterward. 5. Make Sure the Surface Is Suitable Do not stop at “pressure wash and pour.” Check these before you mix anything: The slab is clean, rough, and sound. It is damp but has no standing water. Water beads on the surface? Old sealer is still there. Remove it. The extra height clears doors, steps, and garage openings. The slope sends water away from the house, about 1/8 to 1/4 inch per foot. Does New Concrete Stick to Old Concrete? Not reliably. If you pour fresh concrete onto a smooth, dirty old slab, the layers often separate. A good bond needs a clean, rough surface and the right system for the job. Bonded Overlay A bonded overlay is meant to act as one piece with the old slab. That takes a clean, roughened surface. It often takes a bonding agent or a scratch coat of cement slurry too. Bonded layers can be thinner, but they pass old cracks upward more easily. Unbonded Overlay An unbonded overlay sits on a separation layer, also called a bond breaker. The new slab and old slab move on their own. This lowers the odds of reflective cracking. The new layer is usually thicker so it can carry its own load. Neither

How to Excavate Lawn for Walkway
Concrete

How to Excavate Lawn for Walkway: Step-by-Step Guide

Outline the path with stakes and paint, then dig a trench 6 to 8 inches deep, accounting for a 4-to-6-inch gravel base, 1-inch sand layer, and your paver thickness. Ensure the trench bottom slopes 1/4 inch per foot away from structures for drainage, then firmly pack the bare dirt with a tamper to create a solid subgrade that prevents future settling. Here is how to excavate lawn for walkway projects the right way. Remove the grass and topsoil, dig about 7 to 8 inches deep, compact the soil, and add a firm base. At Ron Hodges Inc have dug walkways in Central Florida soil for over 30 years, and these are the steps we trust. Why Proper Lawn Excavation Matters for a Walkway Excavation gives your walkway a flat, firm, well-drained place to sit. Grass and topsoil are soft and full of roots. They rot and shrink over time, so a walkway built on top settles unevenly. Good ground preparation for a walkway is the part nobody sees and everybody pays for later. In Winter Springs, heavy summer storms can wash out a weak base. A clean, level dig with compacted soil keeps your walkway flat and stops water from pooling underneath. What You Need Before Excavating Knowing how to excavate lawn for walkway work starts with the right gear. Most of it is cheap or easy to rent. Flat spade and square shovel Sod cutter (rent one for a day) Wheelbarrow Stakes, string, and marking paint 4-foot level and tape measure Hand tamper or plate compactor Gloves, boots, and safety glasses It does not mark private lines like sprinkler pipes, so check your yard for those. Read your HOA rules too. Step 1: Mark the Walkway Area Start with the width. Most walkways run 36 inches wide, but 48 inches lets two people walk side by side. Set stakes at the corners and run string between them. For curves, lay a garden hose on the lawn and shift it until the shape looks right. Spray paint along the hose. Then mark the dig line 6 inches wider on each side. Concrete forms and paver edge restraints both need that extra room. Step 2: Remove Grass and Topsoil If you want to know how to dig out grass for a walkway without wrecking your back, rent a sod cutter. It slices the lawn into strips you can roll up and move. A flat spade works fine for short or curved paths. Next, remove the top 3 to 4 inches of soil that holds the roots. St. Augustine grass, common in Central Florida, has thick runners that can push back up through a thin base. Pull every root you find. Keep the sod if it looks healthy. You can use it to patch bare spots along the finished walkway. Step 3: Check the Soil and Grade Look at the soil you just exposed. Most Winter Springs yards have sandy soil, which drains well and compacts nicely. Soft, dark, or mucky spots are a problem. Dig those out and replace them with base material. Now check the slope. Your walkway should drop about 1/4 inch per foot, away from your house. Run a string line along the stakes and measure down with a level. That slight pitch sends rain off the surface instead of toward your foundation. Mark any low spots where water pools. Fix them now with compacted base, not after the walkway is down. Step 4: Excavate to the Correct Depth Here is how deep to dig for a walkway, based on what goes on top. Measure down from your planned finished surface, not from the lawn. Walkway Type Surface Layer Base Layer Total Dig Depth Concrete 4 in. slab 3 to 4 in. compacted base 7 to 8 in. Pavers 2 3/8 in. paver + 1 in. sand 4 in. compacted base 7 to 8 in. Soft or clay soil Same as above Add 2 to 4 in. more base 9 to 12 in. Plan the finished surface about an inch above the surrounding lawn so water runs off. Check your depth every few feet with a ruler against a stake. Keep the bottom flat and at the same slope as your finished walkway. Step 5: Prepare and Compact the Subgrade The subgrade is the native soil at the bottom of your dig. If you are wondering how to prepare ground for a walkway after the digging is done, this step matters most. Rake it level and pull out roots, rocks, and trash. Compact the soil with a plate compactor or hand tamper. Make several passes in both directions. Sandy soil packs best when it is slightly damp, not soaked. Fill any low spots in thin layers of about 2 inches. Compact each layer before adding the next. When you walk across it, the soil should feel firm and leave only a light footprint. Step 6: Add the Base Material Use crushed stone or limerock, which many Florida crews rely on. Both lock together when compacted and drain water well. Here is the order to follow: Lay geotextile fabric first if the soil is soft or you are building a paver walkway. Spread the base in layers no thicker than 4 inches. Dampen each layer lightly and compact it until it feels solid. Check the slope and height with your string line and level. The finished base should match the slope you set in Step 3. It should also sit at the right height for your concrete slab or paver sand bed. Concrete vs. Paver Walkway Excavation The dig looks almost the same for both. The differences are in the details. Concrete: Crews set wood or metal forms along the edges, so you need that extra 6 inches of width. The base can run a little thinner because the slab spreads the load. Pavers: Pavers flex, so base compaction matters even more. You also need edge restraints and a 1 inch sand bed on top of the base.

Are Concrete Driveways a Good Idea
Concrete

Are Concrete Driveways a Good Idea? Pros, Cons & Costs

Your driveway takes more abuse than almost any other part of your home. Cars, trucks, rain, and Florida sun hit it every day. So, are concrete driveways a good idea? For most homeowners, yes, as long as the job is done right. At Ron Hodges Inc, we have worked with concrete for over 30 years. This guide covers the pros, the cons, the costs, and the times when another material makes more sense. By the end, you will know if concrete fits your home and your budget. Are Concrete Driveways a Good Idea? (Short Answer) Yes. A concrete driveway is a smart choice if you want a long-lasting, low-maintenance surface and can handle a higher upfront cost. Poured and cured correctly, it can last 25 to 40 years. The main risks are cracks and stains. Both are easier to prevent than to fix later. Concrete is not right for every property, though, and the sections below show you when to pick something else. Pros of a Concrete Driveway These are the main benefits of concrete driveways. Lasts 25 to 40 Years A well-built slab outlasts most other driveway surfaces. Many last 30 years or more with basic care. Needs Little Upkeep You do not have to reseal concrete every few years like asphalt. A rinse with the hose and a yearly look for cracks is usually enough. Sealing is optional. Handles Heat and Heavy Vehicles Concrete stays firm in summer heat, while asphalt can soften. It also spreads weight well, so trucks, RVs, and boats are fine on a slab that is thick enough. Most home driveways are 4 inches thick. If you park heavy vehicles, plan on 5 or 6 inches. Many Finishes and Colors You can choose a plain broom finish, stamped patterns, stain, or exposed aggregate. A broom finish adds grip when the surface is wet. Adds Curb Appeal and Resale Value A clean, even driveway gives your home a better first impression. Buyers notice cracked, stained driveways right away. Cons of a Concrete Driveway A fair look at the pros and cons of concrete driveways has to include these. Higher Upfront Cost Concrete costs more to install than gravel or asphalt. You pay more now for a longer life. It Can Crack All concrete can crack. Shrinkage, heavy loads, tree roots, and weak soil are common causes. Control joints guide cracks into straight lines so they are less visible. Small cracks are fixable, and our guide on How to Fix Cracks in Concrete Driveway shows you how. Oil and Rust Stains Concrete is porous, so oil, leaf stains, and rust can soak in. Rust from sprinkler water is common in Florida. Sealing helps, and wiping up spills fast helps more. Cure Time Before Driving on It Fresh concrete needs time. Keep foot traffic off for about 24 to 48 hours and cars off for at least 7 days. Full strength takes about 28 days. Repairs Can Show A patch rarely matches the color of older concrete. Resurfacing can help, but a repaired spot often stands out. How Much Does a Concrete Driveway Cost? Published 2026 estimates vary a lot. Many fall between $8 and $20 per square foot installed. Cites Angi for that range and notes that labor can be up to half the cost. Treat it as a starting point, not a quote. Cost factor How it changes the price Size More square feet raises the total, but big jobs often cost less per foot Finish Broom finish costs least. Stamped, stained, or exposed aggregate cost more Thickness and steel 5 or 6 inches and rebar add material and labor Site prep Removing an old driveway, grading, and base repair add cost Access and slope Tight spaces and drainage work take more time So are concrete driveways worth it? Often, yes. Look at the cost over 20 to 30 years, not just day one. New asphalt runs about $7 to $13 per square foot, according to NerdWallet, but it needs regular resealing and usually wears out sooner. Concrete vs Asphalt vs Pavers Each material wins in a different area. Feature Concrete Asphalt Pavers Upfront cost Medium to high Lowest of the three Usually highest Upkeep Low Regular sealing Re-sand and seal joints Heat Stays firm Can soften Stays firm Repairs Patches show Easy to patch Swap single pavers Look Clean, many finishes Plain black Many patterns and colors Pick concrete for value and simplicity. Pick pavers for looks and easy repairs. Pick asphalt when the lowest price matters most. Are Concrete Driveways Good in Florida? Yes. Concrete handles Florida heat and heavy rain well when it is built for local conditions. Here is what matters in Winter Springs, Oviedo, and Longwood. Heat: Concrete stays firm in summer. Pour timing matters, though. Hot, windy days make concrete set too fast, which can cause surface cracks. Rain and drainage: Slope the driveway so water runs away from your garage and foundation. Sandy soil: Sandy soil needs a well-compacted base, or the slab can settle over time. Humidity: Shaded, damp spots grow algae and moss. A yearly wash keeps them in check. Irrigation: Rusty sprinkler water stains concrete. Aim sprinkler heads away from the slab. What Makes a Concrete Driveway Last (or Crack) Concrete driveway durability comes down to the work done before and after the pour. These seven things matter most: Compacted base: A firm base under the slab stops settling and cracking. Right thickness: Use 4 inches for cars and 5 or 6 inches for heavy vehicles. Strong mix: Ask for a driveway mix, often rated 3,500 to 4,000 PSI. Reinforcement: Rebar or wire mesh holds cracks tight if they form. Control joints: Cuts every 8 to 10 feet or so tell the concrete where to crack. Proper curing: Keep the slab damp or covered in the first days so it cures slowly and evenly. Good drainage: Water that sits under or on the slab shortens its life. When Concrete Is Not the Best Choice

What Are Three Types of Concrete
Concrete

What Are Three Types of Concrete? (Plain, Reinforced, and Precast)

What are three types of concrete? Precast, reinforced, and plain concrete are the three primary varieties. For straightforward jobs like driveways, plain concrete costs $5 to $10 per square foot and doesn’t include any steel. For structural component like retaining walls, reinforced concrete, which costs $7 to $15 per square foot, embed steel rebar for high tensile strength. Steps, blocks, and wall panels typically cost between $20 and $30 per square foot. Precast concrete is produced in factory and delivered ready to use. As an alternative, concrete is divided into three categories based on density: heavyweight for radiation shielding, lightweight for lower structural stresses, and normal-weight for conventional pavement. What Are the 3 Main Types of Concrete? So, what are the 3 types of concrete? Here is the short list. Plain (normal-strength) concrete: cement, sand, gravel, and water with no steel. Used for sidewalks, small slabs, and footings. Reinforced concrete: the same mix with steel reinforcement added, like rebar, wire mesh, or fibers. Used for driveways, foundations, and structural work. Precast concrete: factory-cast in molds, cured, then trucked in and set in place. Used for steps, blocks, pavers, and wall panels. Every other type you will hear about is a twist on one of these three. Let’s look at each one. What Is Concrete Made Of? Concrete is a composite material made of Portland cement, sand (fine aggregate), gravel (coarse aggregate), and water. When mixed, a chemical reaction called hydration occurs between the water and cement, creating a binding paste that glues the sand and gravel together into a durable, rock-like structure. A standard concrete recipe follows a 1:2:4 ratio, meaning one part cement, two parts sand, and four parts gravel. While often used interchangeably, cement is not the final product it is simply the key binding ingredient within the larger concrete mixture. Read our post on Is Concrete the Same as Cement. Plain (Normal-Strength) Concrete Plain concrete is the basic mix with no steel inside. You will also see it called normal-strength or ordinary concrete. Those names describe the same thing. Strength comes in two kinds. Compressive strength is how well concrete resists being squeezed. Tensile strength is how well it resists being pulled or bent. Concrete is great at the first and weak at the second. We measure compressive strength in PSI, or pounds per square inch. Sidewalks, patios, and steps can often get by with about 2,500 PSI, while driveways and garage slabs usually call for 3,000 to 4,000 PSI. Plain concrete works well for sidewalks, small slabs, and footings. Those jobs mostly push weight straight down. The limit is cracking. A little settling or shrinking pulls the slab apart, and plain concrete has nothing to hold it together. Penn State researchers note that concrete has low tensile strength and can crack at random without joints. That is why crews cut control joints into the slab. A common rule is to space them 8 to 12 feet apart on a 4-inch slab. Reinforced Concrete Reinforced concrete is plain concrete with steel added. The concrete handles the squeezing. The steel handles the pulling. Together they hold up to much more. There are three common forms of steel reinforcement: Rebar: steel bars tied into a grid. Best for thick slabs and heavy driveway loads. Welded wire mesh: a thin steel grid. Common in 4-inch slabs to hold small cracks tight. Steel fibers: short strands mixed right into the concrete. They help control small shrinkage cracks but do not replace rebar under heavy loads. Here is what many homeowners miss. Steel does not stop cracks. It keeps them tight so the slab stays in one piece. It also has to sit near the middle of the slab. Mesh that lies flat on the ground does almost nothing. You need reinforced concrete for driveways that carry trucks or RVs, garage slabs, and foundations. It is also the standard for structural work like beams and retaining walls. Precast Concrete Precast concrete is poured into molds at a plant, not at your house. It cures there under steady conditions. Then a truck brings the finished piece, and a crew sets it in place. Factory work means tight quality control. The mix, the steel, and the curing are all checked before the piece leaves. Precast also saves time on site. You do not wait for a slab to gain strength. Common precast pieces include: Concrete blocks and pavers Steps and stair units Curbs and septic tanks Precast panels for walls The tradeoffs are size and access. Big pieces need a crane and room to move. Seams between pieces also need care. Prestressed concrete is the stronger cousin of precast. Steel tendons are pulled tight before the concrete is poured. When the concrete hardens, it stays squeezed, so it resists bending much better. You see it in bridges and long floor beams. The Three Types Side by Side Plain Reinforced Precast Strength Strong in compression, weak in tension Strong in both Strong, checked at the plant Crack resistance Low, needs control joints High, steel holds cracks tight High, made under controlled conditions Best use Sidewalks, small slabs, footings Driveways, garage slabs, foundations Steps, blocks, pavers, wall panels Install speed Poured on site, cures in days Similar, plus time to set steel Fastest on site, sets in place Typical home use Walkways, patios Driveways, garage floors Steps, retaining wall blocks Cost level Lowest Medium Varies by piece What Do These Types of Concrete Cost? These are national ranges, not quotes. Prices change by area, so use them to get your bearings. Most homeowners pay $6 to $16 per square foot for a new concrete driveway, or $1,885 to $6,475 total. One HomeAdvisor guide lists plain concrete at $6 to $8 per square foot and stamped at $12 to $18. It puts the concrete itself at $120 to $210 per cubic yard. Wire mesh material runs about $1.00 to $1.50 per square foot, and rebar costs $2 to $3 per square foot installed. Here is our

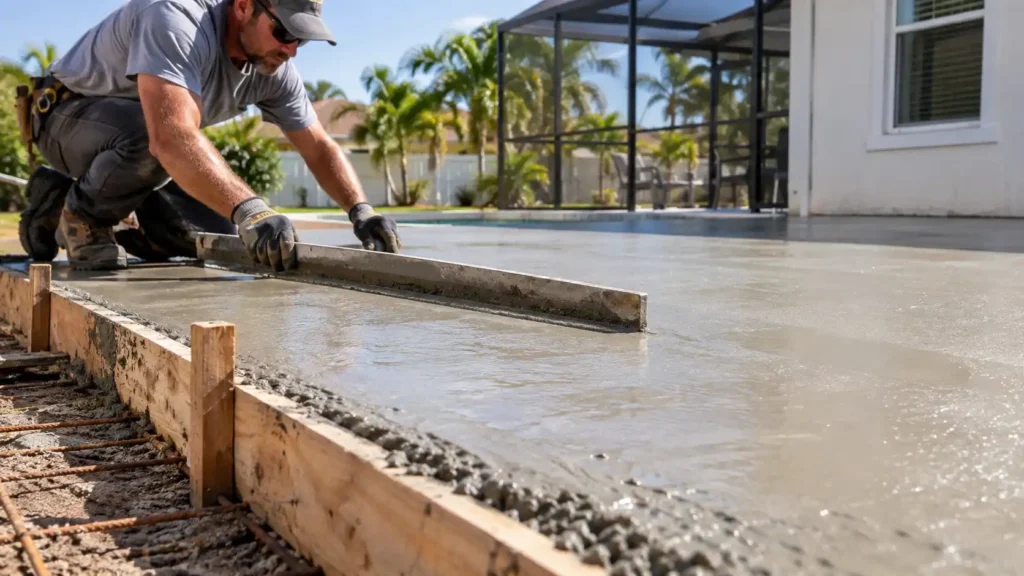
A contractor screeding wet concrete to show how thick should a concrete patio be within wooden forms.
Concrete

How Thick Should a Concrete Patio Be?

For normal foot activity, a conventional concrete patio has to be 4 inches thick; heavier loads, such hot tubs or outdoor kitchens, need to be 6 inches thick; and permanent overhead constructions need footings that are 8 to 12 inches deep. Subject to local municipal construction requirements, how thick should a concrete patio be slab lifespan in Central Florida depends on a compacted 3–6-inch gravel foundation over sandy soil and the proper steel rebar reinforcement for heavy-duty pours. The Quick Answer Normal foot traffic, a table and chairs, maybe a grill? Four inches of concrete handles that just fine. Planning an outdoor kitchen or a hot tub, or dealing with soil that moves? Go with 6 inches. Most local codes set the minimum at 3.5 inches, tied to a concrete strength of at least 3,000 PSI. In practice, almost nobody pours exactly 3.5. Contractors round up to 4 because that extra half inch costs next to nothing and buys you real margin. The International Residential Code is where that 3.5-inch baseline comes from, and most Florida counties build their own code on top of it. So if you searched “how thick of concrete for a patio” and just wanted a number, 4 inches is it, until something specific about your project changes that. When 4 Inches Is Enough Ninety percent of the patios we construct fit this description. A few seats, a lightweight fire pit, and family cookouts. Stable ground underneath. Nothing unusual. The majority of Central Florida is situated on sandy soil, which is really advantageous in this situation. A 4-inch slab atop a well-compacted gravel foundation won’t battle the earth underneath it since it drains quickly and doesn’t heave or shrink as clay does. This thickness of patio concrete is used for sidewalks and pathways for the same reason: it’s sturdy enough for the task and you’re not paying for unnecessary concrete.  When You Need 6 Inches Some patios are basically load-bearing furniture. If any of this sounds like your project, plan on 6 inches: An outdoor kitchen, especially one built with concrete block or stone A hot tub, which puts an enormous amount of weight in a small footprint Heavy stone fire pits or oversized planters A large stamped concrete patio (the extra depth helps the pattern hold its detail) Clay-heavy soil that expands when it’s wet and shrinks when it dries out If you’re torn between building the outdoor kitchen now or “maybe later,” pour the 6-inch slab now. Tearing out a patio because it can’t handle what got added to it later costs a lot more than the concrete would have. What Florida Soil and Weather Actually Change While clay subsoils and heavy seasonal rainfall cause concrete degradation via aggressive shrink-swell cycles, freeze-thaw cracking is minimal in Central Florida municipalities like Winter Springs, Oviedo, and Longwood. Heavy rains can quickly raise the water table and erode underlying sandy bases, reducing the soil’s ability to support loads. Preventing structural failure requires giving drainage management and subgrade preparation first priority. When required, property owners should dig unstable native soils and replace them with aggregate subbases or compacted crushed concrete. They should also perform downpour audits to make sure yard grading slopes at least 1/4 inch per foot away from foundations.  Does a Concrete Patio Need Rebar or Wire Mesh? In summary, the majority of the time, the answer is yes. After someone has decided on a thickness, I get asked this question more often than virtually any other. Wire mesh (6×6 W2.9 is the recommended spacing and gauge) works well for a typical 4-inch patio. Although it won’t prevent a crack from developing, it keeps the slab together in the event that one develops, resulting in a little fracture rather than a piece that moves and creates a trip hazard. Rebar is a preferable option after you’re pouring six inches or working on less-than-solid soil. A good place to start is with number 3 bars spaced 12 to 18 inches apart. Proper thickness is not replaced by any of that reinforcement. Consider it a backup strategy rather than the primary one. Additionally, you should cut control joints into the slab at regular intervals so that any cracking occurs along the intended straight line rather than wherever the concrete chooses to yield.  What Happens If It’s Too Thin, or Too Thick Pour it under 3.5 inches and you’re taking a real risk. Thin slabs crack under ordinary foot traffic. They spall, meaning small chips flake off the surface. They settle unevenly, and now you’ve got a dip that catches someone’s toe. None of that shows up the day you pour it. It shows up a year or two later, after the slab has been through a full cycle of Florida heat and rain. Going too thick won’t hurt the patio, but it will hurt your wallet. Pouring 8 inches for a simple sitting area is money spent on concrete doing nothing useful. The goal isn’t maximum thickness. It’s the right thickness for what the patio actually has to carry. The Base Matters as Much as the Slab Homeowners spend a lot of time thinking about the concrete and almost none thinking about what’s underneath it. That’s backwards. The base is doing just as much work. Most patios sit on 4 to 6 inches of compacted gravel. That layer handles drainage, gives the slab a stable and even surface to rest on, and keeps movement in the ground from reaching the concrete above it. A poorly compacted base is probably the single most common reason a correctly poured 4-inch slab cracks early anyway. Grading matters too. Slope the patio away from the house, roughly a quarter inch per foot, so rain runs off instead of pooling against your foundation. Where the slab meets the house, put in an isolation joint so the two can move independently instead of cracking each other over time. Local Codes and Permits Winter Springs, Oviedo, and Longwood all work off building codes built

Scroll to Top