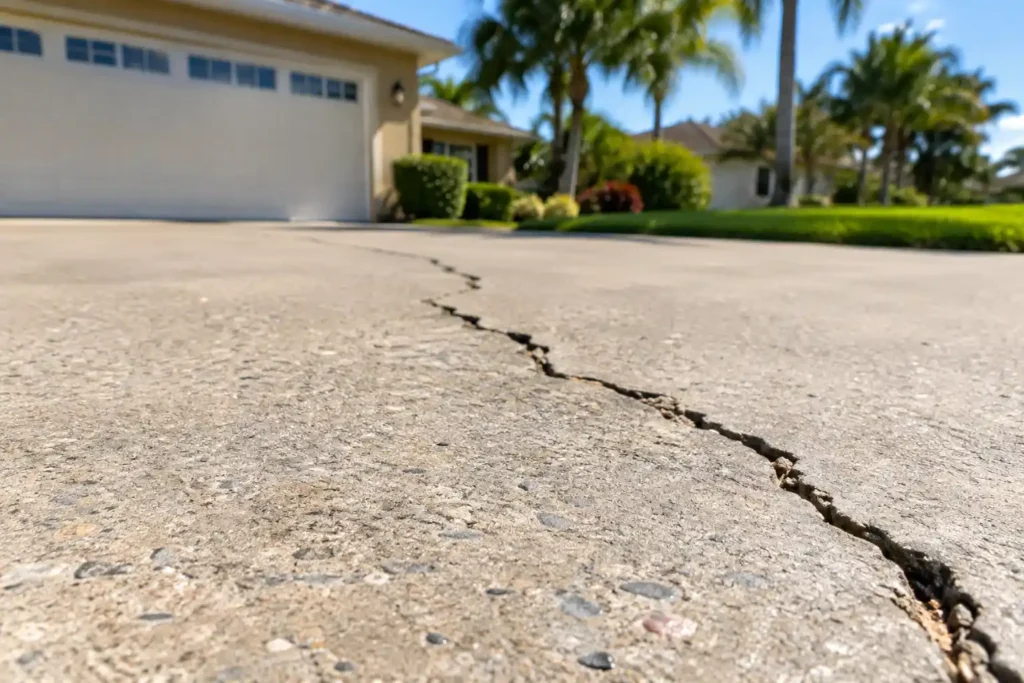
Cracks in a concrete driveway are almost never a surprise. They show up slow, one hairline at a time, until one day you notice a real gap running toward the garage. The good new is most cracks are fixable in an afternoon with the right fillers and a little patience.
This guide walks through how to fix cracks in concrete driveway, from tiny surfaces lines to the wide ones that mean something deeper is going on underneath.
The Quick Answer
To fix a concrete driveway crack, you must first clean out all debris and dry the area completely before selecting a material based on the damage size. Minor hairline cracks under a quarter-inch wide are easy weekend DIY projects that only require a flexible polyurethane caulk. For wider or deeper gap, you will need to insert a backer rod finished with a non-sag sealant or use an epoxy injection.
However, structural issue require professional intervention rather than a quick DIY fixes. If the crack is over half an inch wide, has one side higher than the other, or keeps coming back after previous repairs, you have an underlying base problems. In these cases, you should bypass retail sealants and call a contractor to address the foundation.
Why Concrete Driveways Crack in the First Place
Concrete cracks because it shrinks as it cures during its first year, leaving thin surface lines, and continues to expand and contract with temperature swings for the rest of its life. More severe settlement cracks occur later when the ground underneath compacts unevenly or washes away entirely.
Contractors typically blame this shifting on a poorly compacted base, though tree root intrusion and heavy hydrostatic pressure from rainwater pushing up from below are also major culprit. In Central Florida town like Winter Springs, Oviedo, and Longwood, local conditions accelerate this damage. Summer heat drives slab temperatures past 100 degree, causing severe expansion, while the region notorious sandy subgrade shifts easily and fails to compact like clay.
When heavy rains rapidly saturate this unstable soil, the ground moves beneath the expanding concrete, making driveway cracking repair a uniquely frequent headache for local homeowners.
First, Figure Out What Kind of Crack You’re Dealing With
Before you buy anything, take five minutes and actually look at the crack. This step gets skipped constantly, and it’s the difference between a repair that lasts and one you’ll be redoing next year.
Run through this checklist:
- Is one side of the crack higher than the other? That’s a trip hazard and a sign of settlement.
- Is it wider than a pencil (roughly a quarter inch)?
- Does it run all the way to the edge of the slab?
- Are there several parallel cracks nearby, not just one?
- Does water pool along it after rain?
If you answered yes to any of those beyond the first question, you’re not looking at a cosmetic fix.
Hairline or Cosmetic Cracks
These are thin, often called crazing, and usually under an eighth of an inch. They’re shrinkage cracks and they don’t threaten the driveway’s strength. They’re mostly about keeping water out so they don’t grow.
Moderate Cracks (Under 1/2 Inch)
These have some depth to them and often run a few feet. They still respond well to sealant, but they need proper prep, not just a squeeze of caulk on top.
Structural or Wide Cracks
Anything over half an inch, anything with a height difference between the two sides, or anything paired with sinking nearby is structural. These need more than filler. We’ll get into what that means later in this guide.
How to Fix Small or Hairline Cracks
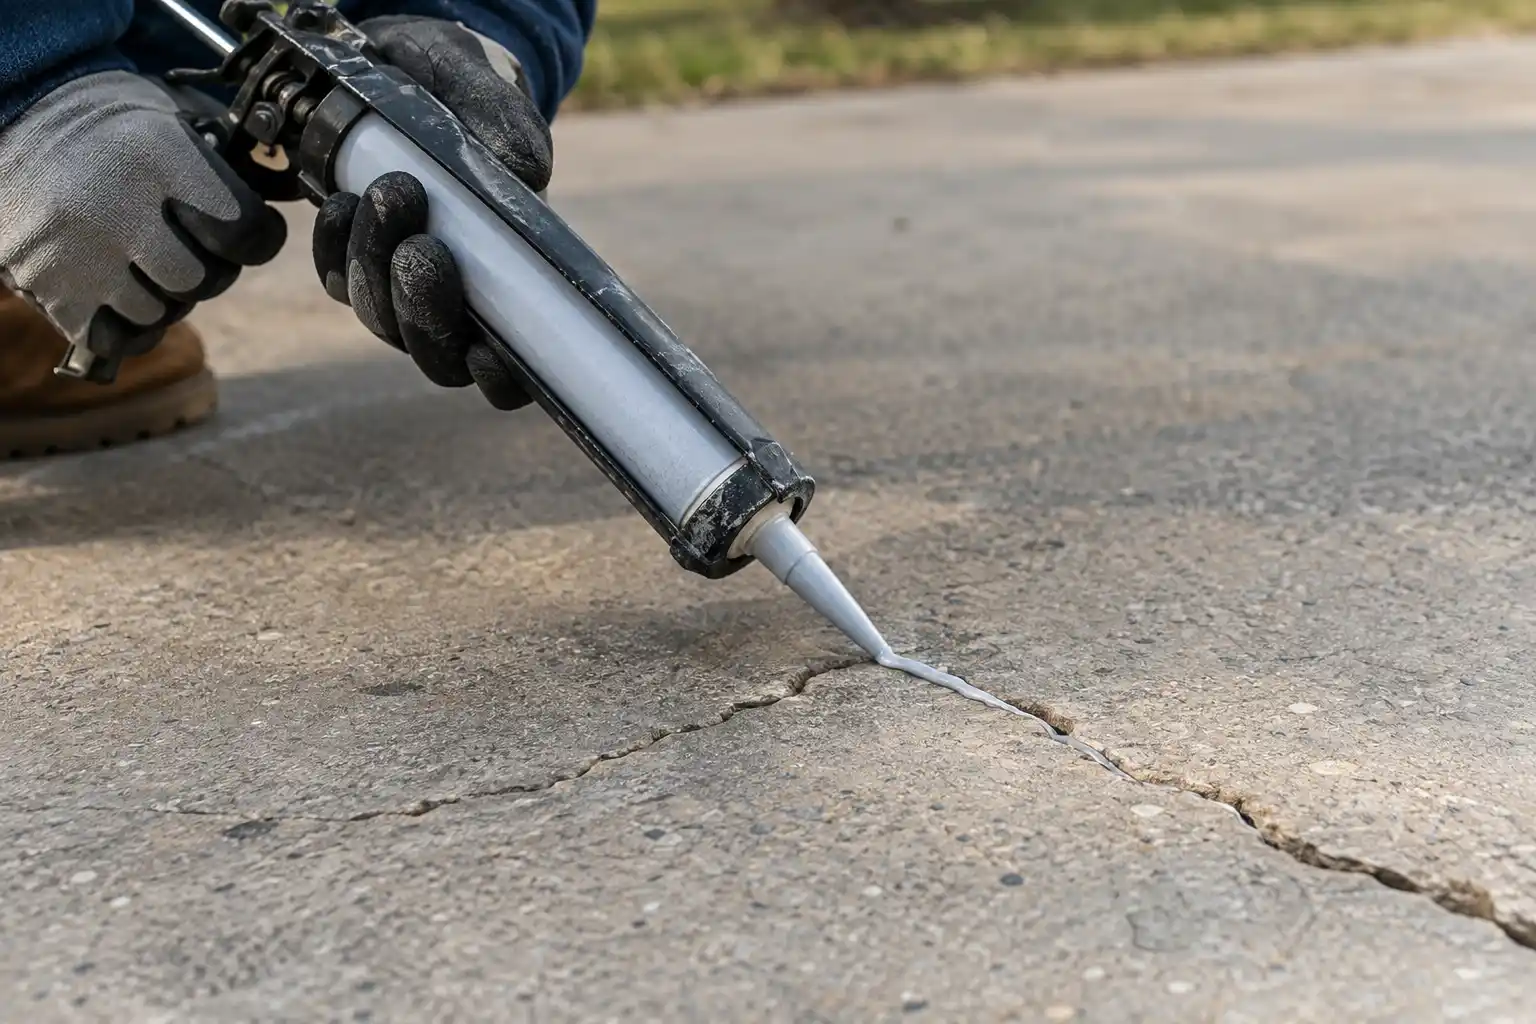
This is the most common version of driveway crack repair, and it’s genuinely a DIY-friendly job.
- Clean it out. Use a wire brush or pressure washer to clear dirt, loose debris, and old sealant from the crack.
- Let it dry fully. Concrete needs to be bone dry for sealant to bond. Give it a few hours in the sun, longer if it rained recently.
- Fill the crack. Load a flexible polyurethane caulk or self-leveling caulk into a caulk gun and run a steady bead along the length of the crack.
- Smooth it out. Use a putty knife or the tip of the caulk tube to level the sealant flush with the surrounding concrete.
- Let it cure. Most products need 24 hours before you drive or walk on the area. Check the label, since cure times vary by brand and temperature.
Skip the backer rod on hairline cracks. It’s not needed until the crack has real depth to it.
How to Fix Large Cracks in a Concrete Driveway
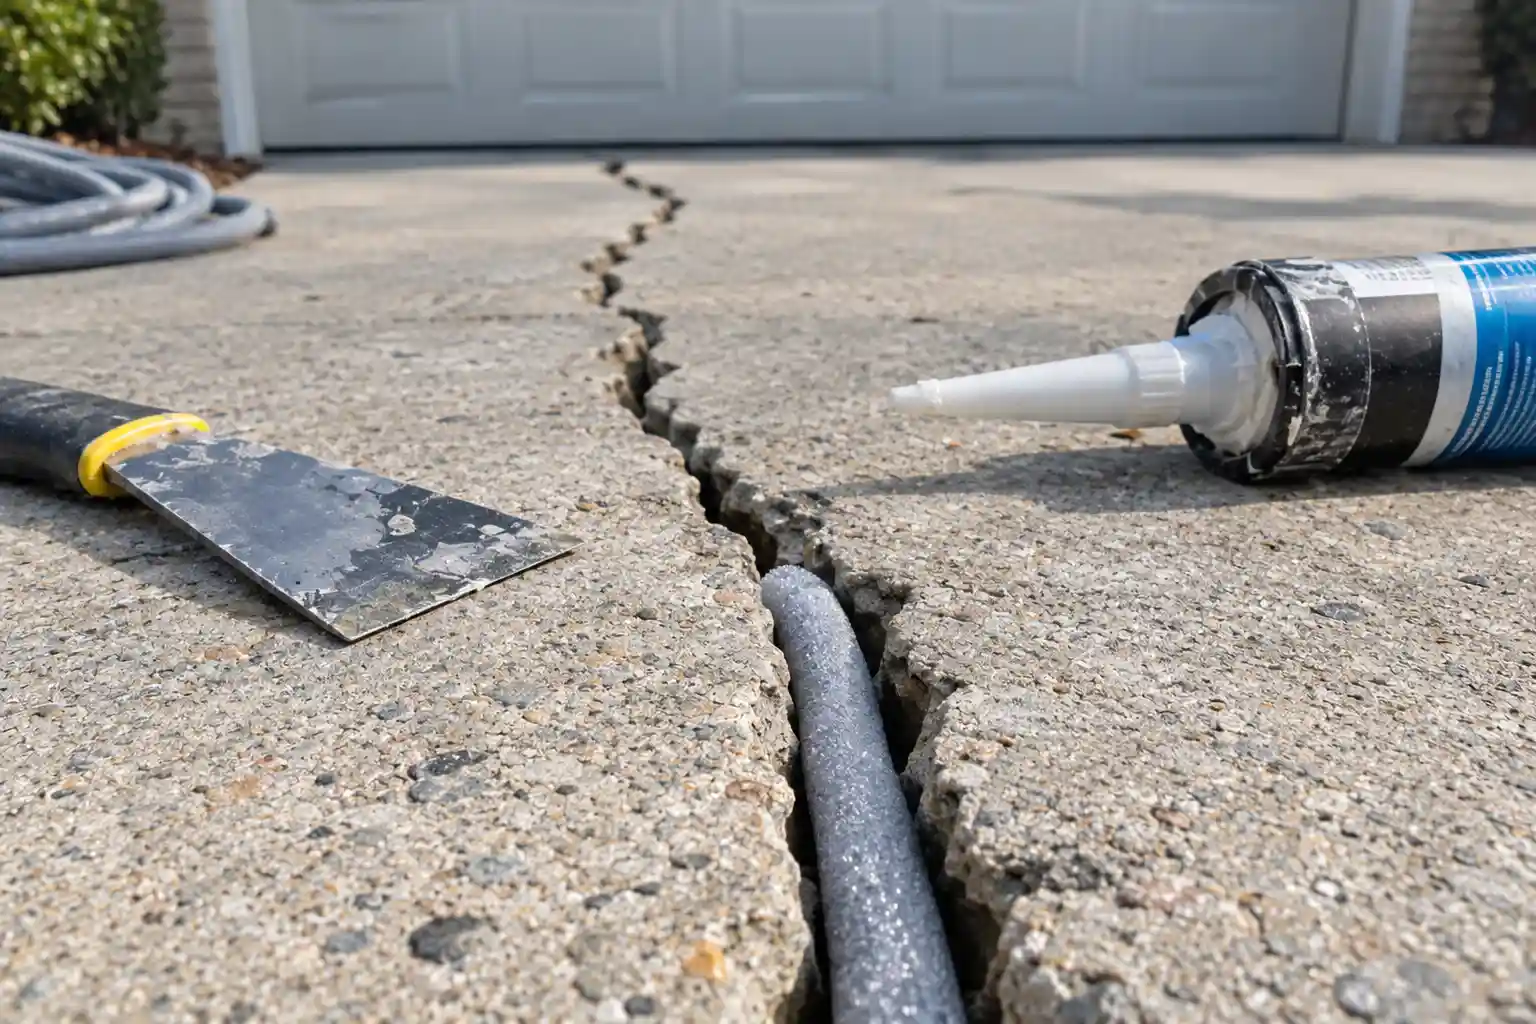
Wide or deep cracks need a different approach, and this is where a lot of DIY driveway repair goes sideways. Homeowners grab a bag of rigid patching compound, pack it in, and watch it crack right back out within a season. We’ll cover why that happens in the next section.
Installing Backer Rod
For cracks wider than a quarter inch, push a foam backer rod into the gap before you add any sealant. The rod does two things: it keeps the sealant from sinking too deep into the crack, and it creates the right shape for the caulk to flex without tearing. Push it in with a putty knife until it sits about a quarter inch below the surface.
Applying and Smoothing the Caulk or Epoxy
Epoxy injection restores structural strength to load-bearing concrete by fusing fractured slabs into a rigid piece, demanding a dry environment and costing between $300 and $800 professionally.
In contrast, polyurethane caulk provides a flexible seal suited for shifting joints in damp conditions, with professional applications ranging from $150 to $500 and DIY tubes costing $10 to $25. For more details on concrete repair options, visit Concrete Network.
Products That Actually Hold Up (and Ones to Skip)
Product that actually holdup the concrete from crack.
Polyurethane Caulk
This is the workhorse for most driveway cracks. It stays flexible after curing, which matters because concrete never stops moving with temperature changes. Products like Sikaflex are built specifically for this kind of joint and crack work and hold up well through Florida’s heat cycles.
Epoxy Injection
Epoxy cures rigid and bonds two sides of a crack back together with real strength. That makes it the right call for structural cracks, but it needs a dry substrate to bond properly, so it’s not the fix for a crack that stays damp.
Why Rigid Patching Compound Fails
This is worth being honest about. Cementitious patching mortar, the gray powder-and-water mix sold at most hardware stores, bonds rigid to the slab. Concrete keeps expanding and contracting, and a rigid patch can’t move with it. The bond breaks, the patch pops loose or cracks right along its own edge, and you’re back where you started within a year or two. It’s cheap upfront and expensive in repeat trips. Flexible synthetic sealants exist for exactly this reason.
When to DIY and When to Call a Concrete Contractor
DIY concrete repair costs under $100 and is perfect for stable, hairline, or moderate surface cracks, though it requires patience to get the sealant smooth. However, you must call a contractor if the crack signals a structural base problem—such as a visible step between the two sides, a sinking slab section, or a crack that keeps reopening after being sealed.
No amount of cosmetic caulk can fix a subbase that has washed out or was poorly compacted. For these deeper issues, expect to pay $3 to $25 per square foot for concrete leveling/mudjacking, or $6 to $14 per square foot for a full slab replacement including demolition and haul-away.
How to Prevent Cracks From Coming Back
A few habits go a long way toward keeping a repaired driveway crack-free:
- Keep drainage moving away from the slab. Standing water is one of the biggest drivers of hydrostatic pressure and erosion under concrete.
- Reseal every 2 to 3 years. A good sealant keeps water out of hairline cracks before they widen.
- Watch tree roots near the edge of the driveway. Roots pushing under a slab are a common cause of heaving in Central Florida yards.
- Respect control joints. These pre-cut lines give the slab a planned place to crack instead of splitting randomly across the surface, and they should be spaced at roughly two to three times the slab’s thickness in feet.
If pavers border your driveway or make up a walkway nearby, regular upkeep matters there too. Our guide on how thick should a concrete driveway be covers gentler methods that won’t wear down paver joints over time.
When It’s Time for More Than a Repair
Sealing a crack buys time, but it doesn’t fix a driveway that’s cracking because the base underneath has failed. If you’re seeing repeat cracks, sinking sections, or a slab that’s more patch than pour at this point, it’s worth getting an honest look from someone local. Ron Hodges Inc has handled Concrete Driveways in Winter Springs FL, along with Oviedo and Longwood, for years, and how to fix cracks in a concrete driveway Central Florida heat and sandy soil treat a slab differently than a driveway up north. If your crack keeps winning, give us a call and we’ll tell you straight whether it’s a repair or a replacement.
FAQ
Will filling a crack stop it from getting worse?
Yes, in most cases. Sealing keeps water and debris out, which is what causes a small crack to widen over time. It won’t fix an underlying base issue, but it stops the crack itself from spreading.
How long does a driveway crack repair last?
A properly prepped polyurethane repair typically holds for 8 to 10 years. Epoxy injections on structural cracks can last even longer since they bond the slab back together rather than just sealing the surface.
Do I need to remove old filler before repairing a crack again?
Yes. Old caulk or patching compound won’t let new sealant bond properly. Dig out or scrape away whatever’s left before you clean and refill the crack.
Is a cracked driveway always a sign of a bigger problem?
No. Most cracked driveways just have a handful of hairline or moderate cracks from normal shrinkage and weather. It only signals a bigger issue when you see height differences, sinking, or cracks that reopen after repair.